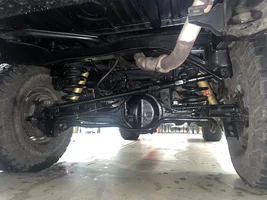
Rear recovery point options?

I recently bought a recovery kit from Yankum Ropes, that included the rope, soft shackles, and that thing that plugs into the rear receiver, and a bag to care it all in. You can get a 10% discount if you enter SandTow in the discount box.

SandTow has a presence on most social media, and YouTube as well. Pretty interesting how well their ropes work at ‘yanking’ vehicles out of predicaments that people get into, especially on Daytona Beach, where I grew up.. their little Tacoma’s are yanking one ton diesels out of the sand using the Yankum kinetic ropes.
 
Last edited:
Looks great and nice option, keep us updated.
It fits, required minor trimming of the lower bumper plastic.
1767975305679.webp

1767975317488.webp
 
It's the same 2, 17mm headed bolts holding the OEM recovery point.

1767983534579.png
 
Last edited:
Oh.. I missed the second one in the first pics.
Yeah, I would not have been too happy either, if Toyota removed one the bolt holes.
 
Congratulation, looks nice, how many bolts did it use and did the spare tire get in the way while installing? Looks like a tight fit.

Also where did you get it? I plan to order one.
I lowered the spare to get better access to the upper bolt.

This was ordered from Toyota of Downtown LA.
1767986020072.webp
 
@turbo8 could guess better since he just did the job, but this one looks like it would also fit but require even more cutting of the bumper.
yeah, looks like it will require more trimming.

I also don't like that long lever arm for a recovery point. For like an angled pull or dropping on that when going down a ledge.
 
Got any pics of how it turned out?
Well, they used to be bright red, but they are kinda dirty now..
IMG_9265.jpeg

The paint I used required sanding the parts beforehand, which was the most time consuming part of the job. I spray painted them off of Miss Daisy, let them dry several days, and then remounted them. I meant to go back, tape off all the other body parts and spray the bolts again, where the impact gun busted off the paint during the install, but our trip out west got in the way.
 
Well, they used to be bright red, but they are kinda dirty now..View attachment 56909
The paint I used required sanding the parts beforehand, which was the most time consuming part of the job. I spray painted them off of Miss Daisy, let them dry several days, and then remounted them. I meant to go back, tape off all the other body parts and spray the bolts again, where the impact gun busted off the paint during the install, but our trip out west got in the way.
Spray some of that paint into the cap and use a small paint brush to touch up. I've done that many times, much cheaper than tape, paper and your time........lol
 
It appears from the photo to be very minimum and with a piece of sheet metal bent to the correct diameter and heated cherry red with a torch, then used as a "hot knife" to cut the divot...... you could probably get away with a divot about the size of a halved quarter.
 
Dang, I don't want to trim the plastic. that's a bit disappointing
I'm pretty sure it was only the silver piece that needed the slight trim, and only on the bottom lip. That part is easily replaceable, but is showing up at around $120...

1768075849970.webp


Also the smaller hole fits a 7/8" bow shackle, but more of the bumper trim would need to be cut to use properly.
1768076196431.webp
 
I'm pretty sure it was only the silver piece that needed the slight trim, and only on the bottom lip. That part is easily replaceable, but is showing up at around $120...

View attachment 56971

Also the smaller hole fits a 7/8" bow shackle, but more of the bumper trim would need to be cut to use properly.
View attachment 56972
It's a good looking install. Couldn't tell it was trimmed unless you were laying on your back looking up.
 
Spray some of that paint into the cap and use a small paint brush to touch up. I've done that many times, much cheaper than tape, paper and your time........lol
Thanks! Great idea!!
 
I ordered a NYTOP rear recovery point along with a second, mirrored one. I’m not sure how this will turn out yet, but I’ll keep you informed. Some welding, drilling, bending or machining will be required, so this won’t be a simple bolt-on solution.


Even for light off-roading, load sharing during a pull is essential. Relying on a single rear recovery point simply doesn’t make sense.
 
Back
Top Bottom