Okay so the new intake lower housing arrived. So did the stainless steel 304 metal cloth. I picked up some exterior super strength velcro tape and got to work.
Disclaimer! I am not recommending that you do this. If you do it’s at your own discretion. There is risks when placing metal into your intake. If a piece broke off and somehow made it through the filter it will damage the engine. It is possible that a rodent could still chrew through and subsequently make a hole in the filter. A small piece of metal (chewed) could break off and get sucked in. That could be the end of your motor. This post is just a overview of how and why I chose this method. It isn’t pretty but it works.
Removing the old air box is very easy. You just disconnect the top of the airbox push it aside and pull the lower housing up. It’s connected by rubber bushings like legos.
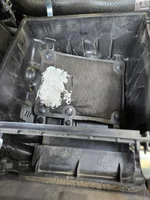
Here is my rodent damaged air box lower housing.
I put alot of thought into this and decided that I wanted to make the screen a serviceable item. I want to cut a frame from the old air box and make it to were I can replace the metal screen if necessary. So I’m going to use the velcro tape as a gasket/fastener. I’m also going to use the plastic fasteners from the old box. First I removed the plastic fasteners from the old air box that held on to my missing noise damper cloth thing. If Toyota thought it was safe to use inside the airbox then they must be okay.
Then I cut the area around the intake inlet out of the damaged box with a plastic cutting disc. Sanded the piece that was cut out to smooth it a bit and to give the velcro tape better adhesion.
Old box after cutting.
Screen frame for the new air box.
I can’t remember what size drill bit I used but its outside width was slightly smaller than the center thickness of the plastic fasteners shafts. Drilled the holes in the new airbox for the fasteners. Drilled the holes in the frame. The one hole on the bottom of the frame I miss aligned, so it should of been smaller. It will be fine because the holes in the airbox came out perfectly and the fasteners fit tight. Two holes I wanted as close as possible to the outside edge of the air inlet. So that is why the frame has two holes that are open to the air inlet hole. That way it will keep the screen tight if a rodent tries pushing it in or out. Applied the velco tape to the inside of the screen frame leaving a gap for the seal edges of the metal screen to be placed inside.
Keep in mind that the frame has to still leave enough room for the air filter to drop into the lower housing. While the width of the velcro seal on the frAme is not very wide here, I was limited on space on the frame that still had to fit inside the box. The metal wire actually will click into hook and loop on the wider velcro on the box essentially locking it in. With the velcro and the fasteners its double safe; sorta like wearing a belt and suspenders.
Then applied the Velcro tape inside the new air box to overlap the plastic frame and metal screen. Put it all together and pushed three of the recycled plastic fasteners into the frame mounted on the box. Also I did cut all the little bent metal bits.
Here you can see the space above the velcro is intentional for the air filter. Notice how the Velcro here is wider.
It’s tight, that screen aint moving. If I need to I can remove the frame and replace the screen later if necessary.