🛠️ What Have You Done To Your LC250 Today?

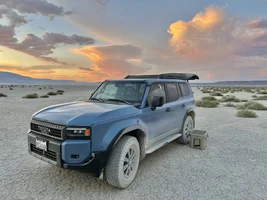
Looks good! Is the ladder hinged at the top or something? Trying to figure out how you’d open the glass hatch or even liftgate altogether.
It's only attached to the rear liftgate. You lose the rear window glass hatch, but the ladder is easily removable if access is wanted and ladder not desired.
 

What light bar is that? It is pretty close to fog light color
Off the top of my head, I don’t recall but it’s on my build page. And it’s a close match because at the time I had fog light covers. So I doubt it matches the rigid fogs.
 
It's only attached to the rear liftgate. You lose the rear window glass hatch, but the ladder is easily removable if access is wanted and ladder not desired.
Ah gotcha. You must not use the glass hatch nearly as frequently as I do; I love that thing!
 
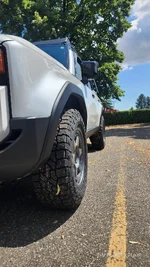
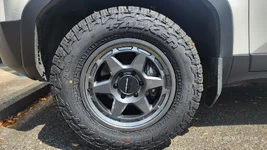
Added the Bonobo rear recovery point. Realized I needed to take the spare down in order to install, so I just ended up completely removing the spare tire and chain attachment altogether as these 35" AT3's don't fit. Happy with the look and build of this product!


IMG_6730.webp
IMG_6732.webp
IMG_6733.webp
IMG_6734.webp
 
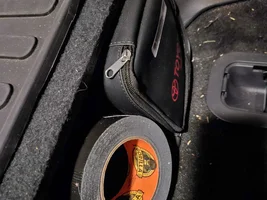
Fitted a sheet of Killmat sound deadening mat to each of the front doors.

10 minutes per door, once you know what you are doing. [just followed YouTube instructions to remove the door cards]

Inserted the Killmat through the speaker apertures.

Doors now close with more of a “Thunk”.

Verdict: Worthwhile 7/10
 
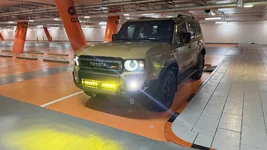
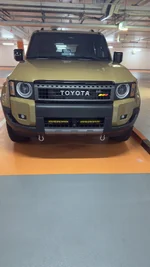
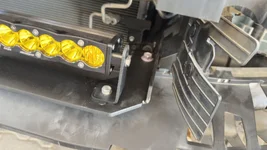
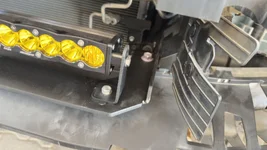
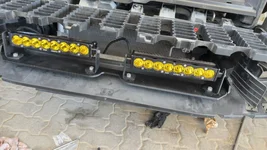
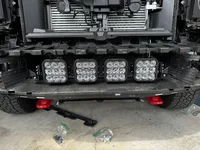
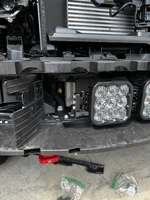
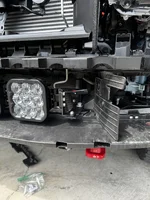
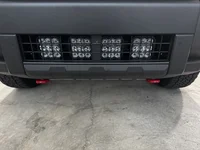
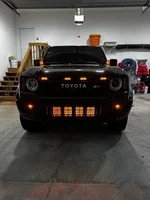
Removed the Front Bumper to accomodate the Baja S8 Driving Combo / Amber LED Light Bar below the radiator grill. And the Lighting distance is over 500 metres. I must thank Toyota for provisioning such space to accomodate required mods. Got a plate 4mm customised to sit in the exact space and bolted to OEM bolt location on either side of the radiator. Next Replaced the OEM fog lights to Baja S1 Wide Cornering Fog LED lights.
 

Attachments

  • IMG_1518.webp
    IMG_1518.webp
    158.3 KB · Views: 274
  • IMG_1395.webp
    IMG_1395.webp
    172.5 KB · Views: 264
  • IMG_1389.webp
    IMG_1389.webp
    104.5 KB · Views: 253
  • IMG_1337.webp
    IMG_1337.webp
    102 KB · Views: 244
  • IMG_1337.webp
    IMG_1337.webp
    102 KB · Views: 251
  • IMG_1336.webp
    IMG_1336.webp
    196.7 KB · Views: 269
1000039483.webp

UPDATE
Got new smart bifocal installed after the LC received "highway character" from a stone dancing in the middle of the highway. FYI the windshield coverage offered at time of purchase doesn't cover a $415 calibration and the contract doesn't specifically include and/or exclude the calibration but states:
"In the event that any coveredwindshield damage cannot berepaired (to be determined by anindependent third party inspector chosen and paid for by Us), We (windshield wawarranty insurer) will pay the actual cost for replacementof the damaged windshield"
If calibration is required during a windshield replacement, it falls within the phase "costs for replacement"... going to fight with the insurer because I was sold piece of mind the costs of a new windshield was covered.
 
Added the Bonobo rear recovery point. Realized I needed to take the spare down in order to install, so I just ended up completely removing the spare tire and chain attachment altogether as these 35" AT3's don't fit. Happy with the look and build of this product!


View attachment 42503View attachment 42504View attachment 42505View attachment 42506
I ordered these and the front ones in Gunmetal for a subdue look on my Underground TLC. Coming Friday and looking forward to the install.
 
Installed some Killmat today, more to get rid of the "tin Can" sound when shutting the doors. I couldn't tell any difference in the db sound level.
Did it improve sound of closing the door?
 
It did - doors are beautifully engineered but the sound when closing can be a little “tinnie”.

Definite improvement - though haven't achieved the Audi ”whumph”

Will add more Killmat or similar when I have more time - suspect 2 sheets [or more] will produce a better result.
 
Yes, not as tin can sounding.
I need to add this to my mod list. Years ago I had an early 90s Mercedes 420 SEL. That car was a tank, and the feeling the doors gave when closed tickled my brain in a good way. I’ve never had a vehicle since then that felt that robust. I know I won’t achieve that door closing feel with mats but I’d like to improve it!
 
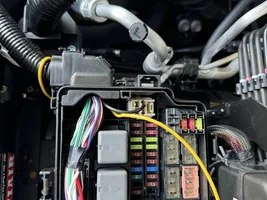
Well today I installed my Diode Dynamics SS5 light bar. I designed and had fabricated some mounts. I also installed the Diode Dynamics fog lights. It looks really good I think. Couldn’t get a pic with them all on as it started raining. More photos to come. Also when removing the bumper on the 1958 model LC it does not have the connector to disconnect on the drivers side only one connector on the passenger side.
 

Attachments

  • IMG_1013.webp
    IMG_1013.webp
    318.3 KB · Views: 300
  • IMG_1014.webp
    IMG_1014.webp
    259.8 KB · Views: 229
  • IMG_1015.webp
    IMG_1015.webp
    273.3 KB · Views: 199
  • IMG_1018.webp
    IMG_1018.webp
    164.9 KB · Views: 230
  • IMG_1017.webp
    IMG_1017.webp
    168.9 KB · Views: 241
Added painted guard plates to my 1958
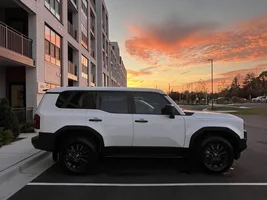
Looks great! Is this your factory top grill or a replacement? I’m not loving the silvery one on my meteor. Looks like the 1958’s come with a matte black upper, this seems glossy though. Whatever it is I like it.
 
Looks great! Is this your factory top grill or a replacement? I’m not loving the silvery one on my meteor. Looks like the 1958’s come with a matte black upper, this seems glossy though. Whatever it is I like it.i a

Looks great! Is this your factory top grill or a replacement? I’m not loving the silvery one on my meteor. Looks like the 1958’s come with a matte black upper, this seems glossy though. Whatever it is I like it.
I did indeed add a glossy grill overlay I found online. I got it at this AU website Toyota Land Cruiser Prado 250 Series Front Grill Blackout Kit - 21 Overlays

You can prob find cheaper ones on eBay from China but I am not sure about the quality on those. Could be one and the same to be honest.
 
Supporting Vendors View all →
Canvasback
Back
Top Bottom