Ham Radio Operators...

I love the minimalist interior of the Land Cruiser, and since I don't "need" ham radio access all the time, I wanted an easy way to install and remove the remote faceplate of my ICOM 2730B. I came across this center console replacement on Amazon with a small opening for a wallet, and figured that was a better option than cutting into the stock console; this way, I can always go back to stock if I want.

I designed and 3D-printed a bracket, along with RJ11 and RJ45 couplers, to fit in the switch locations.
ICOM Bracket.webp
RJ45 Switch.webp
RJ11 Switch.webp

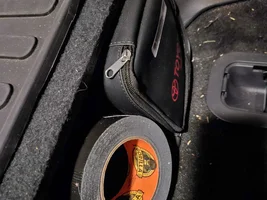
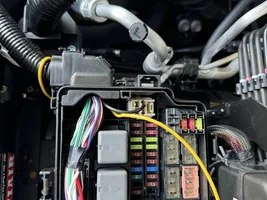
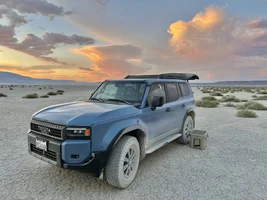
The bracket screws onto the back of the ICOM faceplate and friction-fits into the console opening. A short RJ11 cable connects the faceplate to the radio, and the microphone plugs into the RJ45 connector near the tow-haul button. In under a minute, I can have the radio set up and ready to go or pull it out entirely when I don't need it. For the antenna, I mounted the NMO to a Rago Fabrication A-pillar mount.
IMG_5315.webp

IMG_5319.webp
IMG_5320.webp
IMG_5322.webp

IMG_5323.webp
 
I love the minimalist interior of the Land Cruiser, and since I don't "need" ham radio access all the time, I wanted an easy way to install and remove the remote faceplate of my ICOM 2730B. I came across this center console replacement on Amazon with a small opening for a wallet, and figured that was a better option than cutting into the stock console; this way, I can always go back to stock if I want.

I designed and 3D-printed a bracket, along with RJ11 and RJ45 couplers, to fit in the switch locations.
View attachment 71755View attachment 71756View attachment 71757
The bracket screws onto the back of the ICOM faceplate and friction-fits into the console opening. A short RJ11 cable connects the faceplate to the radio, and the microphone plugs into the RJ45 connector near the tow-haul button. In under a minute, I can have the radio set up and ready to go or pull it out entirely when I don't need it. For the antenna, I mounted the NMO to a Rago Fabrication A-pillar mount.
View attachment 71762
View attachment 71763View attachment 71764View attachment 71765
View attachment 71766
Super awesome setup
I too love the minimalist approach.
Mind sharing the 3d files for the connector or plan on selling them?
 
Keeping a couple of handheld Baofeng units, trying to avoid any extra strains on TLC battery's deficiency.
 
I love the minimalist interior of the Land Cruiser, and since I don't "need" ham radio access all the time, I wanted an easy way to install and remove the remote faceplate of my ICOM 2730B. I came across this center console replacement on Amazon with a small opening for a wallet, and figured that was a better option than cutting into the stock console; this way, I can always go back to stock if I want.

I designed and 3D-printed a bracket, along with RJ11 and RJ45 couplers, to fit in the switch locations.
View attachment 71755View attachment 71756View attachment 71757
The bracket screws onto the back of the ICOM faceplate and friction-fits into the console opening. A short RJ11 cable connects the faceplate to the radio, and the microphone plugs into the RJ45 connector near the tow-haul button. In under a minute, I can have the radio set up and ready to go or pull it out entirely when I don't need it. For the antenna, I mounted the NMO to a Rago Fabrication A-pillar mount.
View attachment 71762
View attachment 71763View attachment 71764View attachment 71765
View attachment 71766
Very nice! Happen to be willing to share the STL for the jack? I need to extend my handset to the driver side. Currently mounted on the passenger side.
 
The DV8 Console Molle Panels make great mounting locations for radios with remote control heads. I running a Yaesu FTM500 2m/440 mobile and a Motorola XPR550 with antennas mounted to the roof rack and at the front fender using the M&R Ditch light brackets on my 2025 LCLC.

I love the TLC!
Were you able to mount those to the top of the dv8 panels using standard m5 bolts? They claim the holes are m5 pem nuts but the m5 bolts I have are too small. Is it actually m6? Thanks!
 
I love the minimalist interior of the Land Cruiser, and since I don't "need" ham radio access all the time, I wanted an easy way to install and remove the remote faceplate of my ICOM 2730B. I came across this center console replacement on Amazon with a small opening for a wallet, and figured that was a better option than cutting into the stock console; this way, I can always go back to stock if I want.

I designed and 3D-printed a bracket, along with RJ11 and RJ45 couplers, to fit in the switch locations.
View attachment 71755View attachment 71756View attachment 71757
The bracket screws onto the back of the ICOM faceplate and friction-fits into the console opening. A short RJ11 cable connects the faceplate to the radio, and the microphone plugs into the RJ45 connector near the tow-haul button. In under a minute, I can have the radio set up and ready to go or pull it out entirely when I don't need it. For the antenna, I mounted the NMO to a Rago Fabrication A-pillar mount.
View attachment 71762
View attachment 71763View attachment 71764View attachment 71765
View attachment 71766
^^^ That is well done... How did you configure the back ends of your RJ11 and Rj45 jacks??
 
^^^ That is well done... How did you configure the back ends of your RJ11 and Rj45 jacks??
I used standard keystone couplers and used a dremel to square them off to fit in the switches. Keystone size is fairly standard so I designed the 22mm Toyota switch around the keystone size. Then it's just a standard coupler electrically.
 
Last edited:
Supporting Vendors View all →
M&R Automotive
Back
Top Bottom