Sound Deadening LC250 Doors with NVX CLD - nice improvement!

I did this to my doors a few months ago. I'm really happy with the results. It seems to reduce a lot of the higher pitched noise, and the doors feel and sound more substantial when they close. I used the NVX 90 mil pack with 36 sq feet. I probably have 5ish sq feet left that I may add to the rear hatch.

I have heard that NVX mats may slip in very hot environments, so there may be other products better for folks in the southwest.
 
Many years ago I did my entire FJ with Dynamat, both the silver stuff and in many areas their foam products. It does help. My only suggestion would be to do the entire vehicle at the same time. Take all the panels out including the headliner. I had to piecemeal it and then sometimes it was hard to notice an improvement by doing just one area. For example, if you just do the doors you will notice a big improvement, but then later when you do the tailgate, you may not notice any change. But, even if you have to do it a little at a time - do it. Then you will only be left with wind and tire noise!
 
Great write up! I'd like to do something about the tinny doors, but this seems like too much effort. 😂
I just installed the side body moldings on my LC yesterday -- not only do I think they look great, but I was anxious to see if they helped with the tinny sounding doors (which on my LC were very noticeable). And WOW -- that problem is now completely gone. All four doors, both windows open and windows closed. This little thing really improves my satisfaction with the car (the tinniness was almost embarrassing when you closed the doors).

I was definitely not willing to tear the doors apart to put in sound insulation -- but installing the door side moldings was not big deal (just take your time and work carefully, esp. WRT measurements).
 

Attachments

  • Land Cruiser 2.webp
    Land Cruiser 2.webp
    323.5 KB · Views: 316
Many years ago I did my entire FJ with Dynamat, both the silver stuff and in many areas their foam products. It does help. My only suggestion would be to do the entire vehicle at the same time. Take all the panels out including the headliner. I had to piecemeal it and then sometimes it was hard to notice an improvement by doing just one area. For example, if you just do the doors you will notice a big improvement, but then later when you do the tailgate, you may not notice any change. But, even if you have to do it a little at a time - do it. Then you will only be left with wind and tire noise!
If I had a lot more free time on my hands I think it would be a fun experiment to do it a little at a time and use a decibel meter to record road noise at 70mph.

Eventually I will get around to installing sound deadening to the doors, but not sure If I would do the entire cabin. I'll try to remember to take a before an after reading when I do.
 
If I had a lot more free time on my hands I think it would be a fun experiment to do it a little at a time and use a decibel meter to record road noise at 70mph.

Eventually I will get around to installing sound deadening to the doors, but not sure If I would do the entire cabin. I'll try to remember to take a before an after reading when I do.
You have to be careful with the sound meter readings. I may not get the next sentence scientifically accurate but the idea of it is accurate. Sound meters measure the decibels coming into the cabin but not the pitch. Adding the pieces to the door does not necessarily reduce the volume of sound coming into the cabin but changes the pitch. The result is a perceived big improvement but does not necessarily measure as one.

I forgot where I saw it but some sound expert did a lengthy response as to why the products worked to improve comfort and sound in the cabin but did not necessarily register lower on the sound meter. It basically came down to certain noises being more aggravating than other noises and by applying the material you are changing the noise your brain hears to less aggravating sound.
 
I forgot where I saw it but some sound expert did a lengthy response as to why the products worked to improve comfort and sound in the cabin but did not necessarily register lower on the sound meter. It basically came down to certain noises being more aggravating than other noises and by applying the material you are changing the noise your brain hears to less aggravating sound.
There's been a lot of aftermarket builders that have verified/ measured db improvements with deadening materials with sound meters, even in Land Cruisers. It has long been a standard practice in custom cars/restomods and car stereo builds to add the material. The LC250 has basically no deadening material in the doors, or most other panels from the factory. Even modest installs should have measurable improvements.
 
You have to be careful with the sound meter readings. I may not get the next sentence scientifically accurate but the idea of it is accurate. Sound meters measure the decibels coming into the cabin but not the pitch. Adding the pieces to the door does not necessarily reduce the volume of sound coming into the cabin but changes the pitch. The result is a perceived big improvement but does not necessarily measure as one.

I forgot where I saw it but some sound expert did a lengthy response as to why the products worked to improve comfort and sound in the cabin but did not necessarily register lower on the sound meter. It basically came down to certain noises being more aggravating than other noises and by applying the material you are changing the noise your brain hears to less aggravating sound.
You’re 100% correct: DB readings are helpful, but don’t come close to telling the full story of improving the interior experience. The frequency is just as (if not more) important than the decibels.

Edit: typos.
 
There's been a lot of aftermarket builders that have verified/ measured db improvements with deadening materials with sound meters, even in Land Cruisers. It has long been a standard practice in custom cars/restomods and car stereo builds to add the material. The LC250 has basically no deadening material in the doors, or most other panels from the factory. Even modest installs should have measurable improvements.
I was specifically referring to the CLD tiles related to cheap decibel meters. More expensive measurement devices would be able to differentiate frequencies for sure. Apologies if that wasn’t clear.
 
Great post!

I’d like to decrease engine noise in my 1958. It was rumored on Reddit that 1958s had less sound deadening than the other trims. Would this work around the hood, floor, and dash area? Not sure where to start on taking the dash apart.
 
Great post!

I’d like to decrease engine noise in my 1958. It was rumored on Reddit that 1958s had less sound deadening than the other trims. Would this work around the hood, floor, and dash area? Not sure where to start on taking the dash apart.
I have no idea if the sound deadening in the 1958 is the same as the base LC. Having said that, I would approach this with a minimalist, step-by-step approach. Start with the doors (like I did). If that doesn't quiet it enough, then start watching some videos of people installing sound deadening in other areas - like under the carpet and in the roof. Chloe Kuo did a nice video showing her installing Sound Deadening a Tacoma, which should give you some idea of how insane you can go with CLD squares (Constrained Layer Dampening). A little research into CLD will tell you that the NVX material is probably the best bang for buck CLD to use (Resonix is rated slightly higher, but is significantly more expensive.) I would not use the Amazon CLD and definitely would avoid most of the products sold on Amazon (including the very popular but not nearly as effective Kilmat and Siless.) From my research, a less is more approach is probably better than trying to cover different areas 100%. In fact, the additional weight of placing that much CLD in your truck really doesn't make any logical sense. It takes as little as 30% coverage to get about 90% of the desired deadening. Having driven my truck on some lengthy road trips at high speeds (the speed limit is 75 mph in Kansas), I can attest to the effectiveness of the sound dampening I added to the truck. At this point, I only notice wind noise in heavy crosswinds (over 15 mph). One area I'm not sure about on the 1958 - does your hood have the sound deadening material underneath? If not, the best thing to do would be to buy the Toyota OEM part and add that to your hood. You could also apply some of the CLD underneath the hood, but I'd be cautious because of the heat in this area (the CLD material should withstand the heat, but I'm not so sure about the adhesive. And, if the CLD material softens and then drips on the engine bay, that could be a real disaster. )

When you're done here, head over to the Land Cruiser of the Month and cast a vote (for me or anyone else you think has a cool pic.)

Looking down from Black Bear Pass into Telluride.
IMG_7959_Black Bear Pass.webp
 
Last edited:
When I was looking for a Land Cruiser/GX I reached out to either Toyota or Lexus and asked about NVH/Sound Dampening on the body. They indicated all versions have the same level of NVH/sound dampening.

GX has the acoustic glass all around which makes an additional difference.

If anyone knows off the top of their head the email address of Toyota and Lexus customer service I will see if I can find the email they sent in response so you can see the actual wording.
 
@Blue Bear Just wanted to say thanks 🙏 for the writeup and posting the templates - I just finished doing all four of my doors. The tinny noise when opening/closing the doors was honestly one of the few annoyances I had with the car, I'm so happy with the difference this makes!
 
You have to be careful with the sound meter readings. I may not get the next sentence scientifically accurate but the idea of it is accurate. Sound meters measure the decibels coming into the cabin but not the pitch. Adding the pieces to the door does not necessarily reduce the volume of sound coming into the cabin but changes the pitch. The result is a perceived big improvement but does not necessarily measure as one.

I forgot where I saw it but some sound expert did a lengthy response as to why the products worked to improve comfort and sound in the cabin but did not necessarily register lower on the sound meter. It basically came down to certain noises being more aggravating than other noises and by applying the material you are changing the noise your brain hears to less aggravating sound.
You make an excellent point. About a year ago Tom Scott did a nice video on human perception of volume. So, for anyone wanting to go down this rabbit hole just a little bit, here you go!

 
The hint on the rear door disassembly is that when I removed the rear door card, the window seals came with the door card. You should carefully remove the window seals from the door card and re-attach them to the door before attempting to re-install the door card. In addition, the door handle is more difficult to align and install properly on the rear door. Maybe someone wants to make a video showing how to do this?

Thank you for the write up and pictures, it was a great help.

I too was struggling with the rear door cards. I couldn't get the window seal to line up with the door card. It turned out that the white clip (pic) was still attached to the door card. I took it off and installed it on the door (in the windows seal). After that, the door card installed without an issue.
I had to do this a couple of times because in my enthusiasm I first forget to install the speaker and then forgot to plug in some plugs, oops 🤭

IMG_2100.webp


IMG_2101.webp


IMG_2102.webp


I took it for a short test drive and the difference is noticeable. I might be somewhat of a placebo effect but it feels more solid and is surprisingly quiet. I a very happy with the result and it was a fun little project.
 
I just installed the side body moldings on my LC yesterday -- not only do I think they look great, but I was anxious to see if they helped with the tinny sounding doors (which on my LC were very noticeable). And WOW -- that problem is now completely gone. All four doors, both windows open and windows closed. This little thing really improves my satisfaction with the car (the tinniness was almost embarrassing when you closed the doors).

I was definitely not willing to tear the doors apart to put in sound insulation -- but installing the door side moldings was not big deal (just take your time and work carefully, esp. WRT measurements).
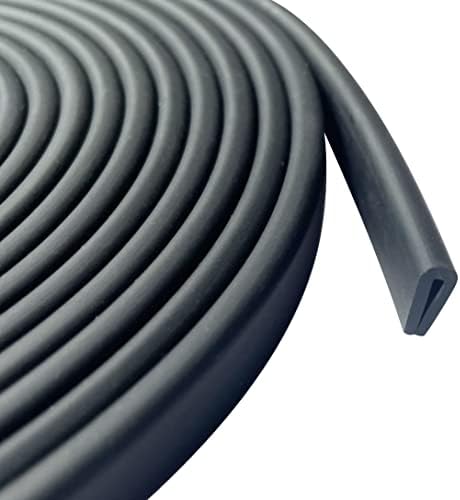
Funny, I had these installed and removed them as they take away from sleekness of the car. They did make the doors sound more sturdy for sure.
 
Thank you for the write up and pictures, it was a great help.

I too was struggling with the rear door cards. I couldn't get the window seal to line up with the door card. It turned out that the white clip (pic) was still attached to the door card. I took it off and installed it on the door (in the windows seal). After that, the door card installed without an issue.
I had to do this a couple of times because in my enthusiasm I first forget to install the speaker and then forgot to plug in some plugs, oops 🤭

View attachment 50310

View attachment 50311

View attachment 50312


I took it for a short test drive and the difference is noticeable. I might be somewhat of a placebo effect but it feels more solid and is surprisingly quiet. I a very happy with the result and it was a fun little project.
I believe that is exactly what I eventually figured out. Thank you for the clarification!
 
Quick question: Now that I have installed the insulation and reinstalled the door cards, unlocking my doors is different. When I grab the handle, I hear it opening all doors 5 times. Normally it would indicate it with 2 beeps or flashes but now it does this 5 times too. Could I have forgotten to plug in some plug in one of the doors? Do I need to reset something? I looked into the menus but I don't see anything obvious.
 
Quick question: Now that I have installed the insulation and reinstalled the door cards, unlocking my doors is different. When I grab the handle, I hear it opening all doors 5 times. Normally it would indicate it with 2 beeps or flashes but now it does this 5 times too. Could I have forgotten to plug in some plug in one of the doors? Do I need to reset something? I looked into the menus but I don't see anything obvious.
Sorry - no idea what's going on. Everything should reset to normal if you plugged everything back in correctly.
 
I might be going crazy. 🤪

I went ahead and took all the door cards of again to check if I had missed anything. It's amazing how quick you can do something once you have a bit of experience. Taking them off and installing them again took maybe 15 minutes in total. Anyway, all plugs were plugged in and everything seems. totally fine.
I also disconnected the battery in the hopes it would reset something but that made no difference.

I am now seriously doubting myself. Maybe the 5 time repet opening click is normal. If I grab the handle and let go, it unlocks and does the 5 times repeat. If I grab the handle and open the door (which I guess is something I always normally do), it just opens and doesn't do the 5 time repeat. So maybe it is normal and I just didn't notice it before.

Maybe I am overthinking this. Could someone please check if your LC does the same? Grab the inside of the handle to unlock and let go. Does it repeat the unlock click 5 time or does it do it just once?
 
I spent a few hours installing some NVX CLD in the doors of my LC250 a few days ago. The doors have never sounded particularly solid when I close them (unlike the GX550 doors) and I wanted to add some sound deadening both to reduce NVH and improve the sound of the speakers slightly. The short version is that I am 100% pleased with the installation. The doors feel more solid (the CDL adds mass to the door), sound more solid on closing, and the sound coming from the door speakers has less tinny resonance. For me, this falls under the "highly recommended" mods for our beloved LC250. One sidenote - I highly recommend the NVX CLD as the best bang for the buck on the market. You can spend more (Resonix), but the NVX stuff is legit (long story short, this is based on actual testing of CLD. The Resonix website is full of detailed test information on CLD.)

In the video below the front door has sound deadening, but the rear door does not.


View attachment 38139

I used just four pieces of 18" x 32" NVX sound deadening. You can buy in either a 5-piece kit or a 9-piece kit. You should also buy at least two rolls of butyl rubber sealant, which I found is more useful than I realized. You also need a good roller to install the sound deadening on the door (do not buy the heavy duty roller!) You will also need a sharp utility knive (change the blade frequently!), straightedge, and something to clean the surface before applying the NVX (like CarPro Eraser or GTechniq Panel Wipe). I bought the 9-piece kit, two rolls of butyl rubber sealant, and the roller for $131. However, I now have 5 pieces of NVX left over. If you only want to do the doors, then only get the 5-piece kit. I'll think about installing some of the CDL in the lift gate, but will likely just sell the left over material.

Removing and re-installing the door cards is the toughest part of the job. Here is a link to a video showing how to do the front door cards. I did not find a video showing how to remove and reinstall the rear door cards (tougher than the front ones!), but thanks to @EOD Guy, the TIS is attached below. I would remove the puddle lights at the bottom of the door prior to removing the door cards. The hint on the rear door disassembly is that when I removed the rear door card, the window seals came with the door card. You should carefully remove the window seals from the door card and re-attach them to the door before attempting to re-install the door card. In addition, the door handle is more difficult to align and install properly on the rear door. Maybe someone wants to make a video showing how to do this?

Here are some pics showing where I installed the CDL and butyl rubber. You can get substantial improvement applying the CDL to as little as 30% of the door. In general, it is much better to use one large piece as opposed to several small pieces. I chose to only cover large areas of flat sheet metal and I'm pleased with my results.

1. Front door after door card removal.

View attachment 38098

2. Remove black plastic panel and speaker to expose the interior side of the exterior panel.

View attachment 38099

3. Cut and install four pieces of CDL in the door.

View attachment 38100View attachment 38101


View attachment 38102View attachment 38103

4. Here's a pic with some arrows pointing out places to install the butyl rubber rope. The rope is a perfect dampener between pieces of metal that are joined together.

View attachment 38105

5. I installed one small piece on the inner side of the inner sheet metal. I wasn't sure where I could install the CLD without interfering with the door card, so I was conservative with my placement. The CLD is in the lower center part of the door.

View attachment 38106

6. Rear door pics. The sealant on the plastic moisture barrier is butyl rubber rope. If needed, you can always use some of your rope to reinstall the moisture barrier. I did not need to do so. I installed three pieces on the rear door - bottom, middle, and top. I could not get a good picture of the top piece, but you can see it in the last pic.

View attachment 38107View attachment 38108

View attachment 38110
View attachment 38111

I didn't take as many pics of butyl rubber, but it installs in the same type of locations as on the front door. Here is a pic showing it installed along the crash bar.

View attachment 38147

I've also attached some pics at the end showing the sizes of pieces I cut (which may be helpful to some.)
Do you have the LC Premium or just LC. I saw the wiring harness for the door bin ambient lights, which is why I am asking. I have the plain LC (not premium) and wondered if its wiring harness had the door ambient lighting wires pre-rung.
 
Supporting Vendors View all →
Back
Top Bottom