🛠️ What Have You Done To Your LC250 Today?

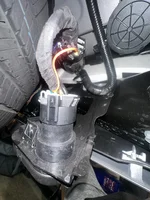
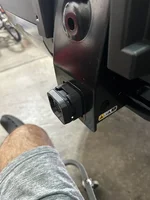
Completely a DIY mod. I took apart one of the door projector lights, cut off the mounting tabs. I drilled a hole in the hatch switch panel the same size as the clear lens but not as big as the black plastic lens housing. I made an alum ring with a inner diameter the same as the round lens housing and "JB" welded it to the switch panel. The lens fits snugly in the alum ring and the actual LED and circuit board sits on top of that etc.... It sits at an angle on the plastic switch panel, so I filled the angle with JB Weld.
Can you post a few photos of the mounting location. Thx.
 
IMG_5302.jpeg

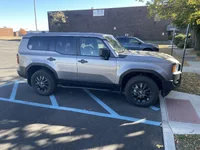
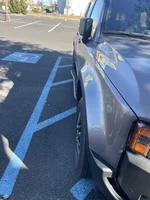
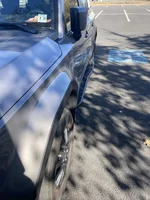
Got my Greenlane step installed much easier than I expected. I added more pictures to see the bump out feature on these. For reference these are the flat style. Hopefully soon I’ll get to the tires.
 

Attachments

  • IMG_5299.webp
    IMG_5299.webp
    320.4 KB · Views: 441
  • IMG_5300.webp
    IMG_5300.webp
    317.6 KB · Views: 378
  • IMG_5301.webp
    IMG_5301.webp
    374.3 KB · Views: 366
I performed an oil and filter change at 1200 miles, and while it was all apart under the vehicle hosed it down with a bunch of Amsoil MPHD undercoating to inhibit corrosion from road salts this winter. Took about 3.5 cans.

Then discovered a screw in the drivers side front tire.

IMG_0535.webp


Marked it with a paint pen, I will get it fixed later this week.
 
This Amsoil MPHD sounds really interesting. I bought a couple cans of Inox to be used in same manner but this stuff might be better.
 
I’m pretty sure it’s just cosmoline with some other chemicals and an aerosolized thinner to allow it to spray. I didn’t know how much it would take so I ordered 12 cans.

Guess I have enough for the next 3-4 years LOL.
 
I performed an oil and filter change at 1200 miles, and while it was all apart under the vehicle hosed it down with a bunch of Amsoil MPHD undercoating to inhibit corrosion from road salts this winter. Took about 3.5 cans.

Then discovered a screw in the drivers side front tire.

View attachment 16109

Marked it with a paint pen, I will get it fixed later this week.
I had the same when I picked up Miss Daisy July 28, only it was on the outside of the shoulder. They replaced the tire before I left the dealership..
 
After a lot of grief and cursing, got the goose plate in. Parts missing/incorrectly sized, but got it secured enough. Looks good at least. Not much looking forward to the installation process of the seat delete now though
IMG_0546.webp
 
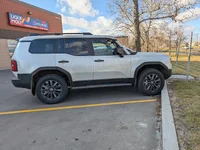
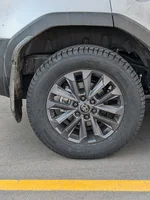
Not terribly exciting, but got my first oil change and mounted up 275/60/20 snow tires. Went with the General Artic Grabber. Fills the wheel well better than stock.
 

Attachments

  • PXL_20241029_211028591.webp
    PXL_20241029_211028591.webp
    459.4 KB · Views: 371
  • PXL_20241029_211038805.webp
    PXL_20241029_211038805.webp
    412 KB · Views: 448
Yes. Everything.... And did you get both seat deletes or just one side
Both seat deletes+plate system cost 3090. The front base plate side screw holes are missing their threading so I’ll need to wood glue to triangle pieces (fortunately they’re just aesthetic)

The bolts that secure the whole system to the car are definitely incorrectly sized. I think they must have not used metric which seems like a pretty big oversight. Their instruction manual is also wrong on multiple parts (location of 40mm and 60mm bolts is swapped, listed socket size for aforementioned bolts is too small, no mention of removing the T-bolt slider from the main plate, and more)

The actual quality of the parts is good, but the above problems are definitely not reflective of that price point.
 
Both seat deletes+plate system cost 3090. The front base plate side screw holes are missing their threading so I’ll need to wood glue to triangle pieces (fortunately they’re just aesthetic)

The bolts that secure the whole system to the car are definitely incorrectly sized. I think they must have not used metric which seems like a pretty big oversight. Their instruction manual is also wrong on multiple parts (location of 40mm and 60mm bolts is swapped, listed socket size for aforementioned bolts is too small, no mention of removing the T-bolt slider from the main plate, and more)

The actual quality of the parts is good, but the above problems are definitely not reflective of that price point.
Agreed. Thank you
 
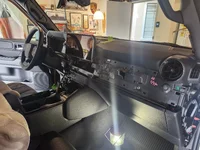
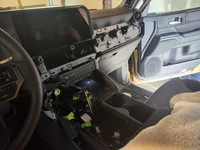
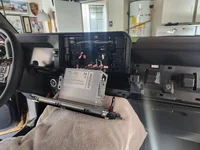
Finally installed the Beat Sonic amp today. A couple panels took awhile to remove, but overall not too bad. Not going to be like the Tesla sound system in my Model 3, but it did improve the sound of JBL system. Overall very happy with the upgrade.
 

Attachments

  • 20241101_101904.webp
    20241101_101904.webp
    278.2 KB · Views: 414
  • 20241101_101916.webp
    20241101_101916.webp
    192 KB · Views: 369
  • 20241101_102625.webp
    20241101_102625.webp
    219.3 KB · Views: 482
After trying to figure out on how to attach this for over a month without dismantling the grille, I finally did it by using a different nut and using a small wrench. Thought about a Wing nut, but it would be visible from outside the grille.
 

Attachments

  • 20241103_125713.webp
    20241103_125713.webp
    216.8 KB · Views: 497
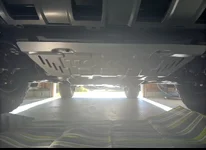
Easy peasy oil change with the drain valve and installed front and rear skids.
 

Attachments

  • IMG_2536.webp
    IMG_2536.webp
    47.9 KB · Views: 496
Hi everyone-
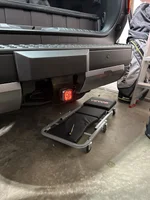
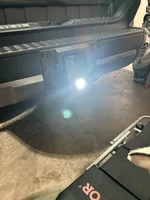
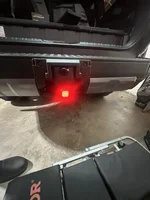
Next step in mods done today. Installed a Diode Dynamics hitch light. Super easy. Tool in pics was to pop the factory fasteners off the hitch cover. Scan QR code in package and you are all but done. More lights are better for sure. Stay safe.
 

Attachments

  • IMG_2464.webp
    IMG_2464.webp
    132.7 KB · Views: 390
  • IMG_2463.webp
    IMG_2463.webp
    142.6 KB · Views: 355
  • IMG_2461.webp
    IMG_2461.webp
    103.8 KB · Views: 344
  • IMG_2460.webp
    IMG_2460.webp
    312 KB · Views: 343
  • IMG_2459.webp
    IMG_2459.webp
    135.7 KB · Views: 381
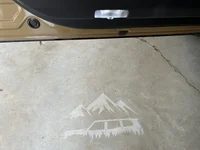
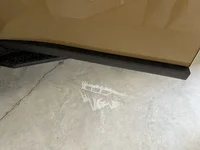
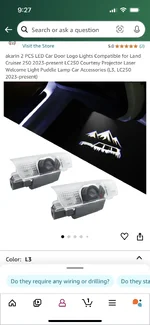
Installed door puddle lights. Easy 2 min installation process per door. Lights have same plug connector as original lights so easiest install I’ve done. Original lights weren’t noticeable. These project a focused image that is easily seen in daylight. Amazon ordered product.
 

Attachments

  • IMG_4958.webp
    IMG_4958.webp
    229.5 KB · Views: 348
  • IMG_4959.webp
    IMG_4959.webp
    211.5 KB · Views: 325
  • IMG_4961.webp
    IMG_4961.webp
    107 KB · Views: 329
Hi everyone-
Next step in mods done today. Installed a Diode Dynamics hitch light. Super easy. Tool in pics was to pop the factory fasteners off the hitch cover. Scan QR code in package and you are all but done. More lights are better for sure. Stay safe.

I just installed mine this evening.

Pretty easy, and surprisingly effective:

IMG_0557.webp
IMG_0558.webp


I also took a few moments to rid myself of the terrible iForceMax badge a few days ago.

IMG_0550.webp
 
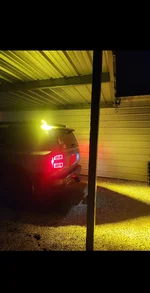
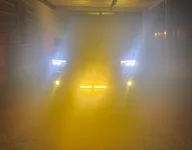
I finally have better lights for camping and pitch black dark roads in the country and state/national parks. The rear chase/camp lights are awesome for seeing your surroundings when setting up camp and cooking. Also don't want to park on an ant mound or not see a snake. I use a handheld UV light for scorpions.

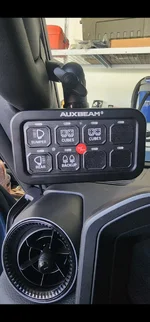
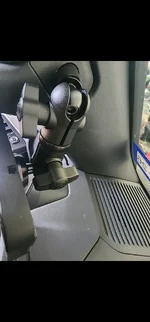
Auxbeam 800 mounted on a 67 Designs mount. All the lights are Diode Dynamics that have a 8 year warranty. I am waiting for my Nashfab ditch light brackets to arrive and I have another set of Diode lights for that on order. The 2 top cube light buttons will control those (high and low). I need new stickers... the bottom buttons are also high and low for the rear and I have 3 blanks left.
 

Attachments

  • Screenshot_20241109_093758_Gallery.webp
    Screenshot_20241109_093758_Gallery.webp
    223 KB · Views: 326
  • SmartSelect_20241109_095422_Gallery.webp
    SmartSelect_20241109_095422_Gallery.webp
    21.9 KB · Views: 312
  • Screenshot_20241106_104301_Gallery.webp
    Screenshot_20241106_104301_Gallery.webp
    216 KB · Views: 324
  • Screenshot_20241106_104252_Gallery.webp
    Screenshot_20241106_104252_Gallery.webp
    202.2 KB · Views: 327
Supporting Vendors View all →
Back
Top Bottom