🛠️ What Have You Done To Your LC250 Today?

Awesome. Those look great.

There is another thread about exploring the idea of swapping in a bigger 21 gallon gas tank from the GX 550 or other after market options. How would you compare the pros/cons with the side panels and Rotos against a approx $3k theoretical main tank replacement?
Wow..$3k for a tank upgrade! I will use my Rotopax all day long. With 2 molle panels and up to four 2 gallon Rotopax that will work fine for me.
 
Awesome. Those look great.

There is another thread about exploring the idea of swapping in a bigger 21 gallon gas tank from the GX 550 or other after market options. How would you compare the pros/cons with the side panels and Rotos against a approx $3k theoretical main tank replacement?
It was about 2k not 3k but still expensive for 3 more gallons.... I'll wait for long-range America to come out with theirs
 
Just installed the shadow lights on both front doors and gas cap overlay .
Can you elaborate on how you removed the existing lights from the door? I ordered the same thing from Amazon and there was supposed to be a tool included...what I got looks nothing like the video example, so I wanted to make sure on how to remove the existing lights to replace. Any help is appreciated!
 
Car comes with a “half” cover. Once I get home I can take a pic. Just got the LC yesterday, haven’t installed it yet.
But the half cover looks worse as it exposes part of the hitch which isn’t attractive.
 
Just installed the illuminated (front) door sills. No tools, at night, in the dark, with a phone as a flashlight. The plug covering the OEM harness was the hardest part. Didn’t use the zip ties, really no need to.
I still have to figure out keeping the interior lights on for a bit after locking…I know the “door” button in the overhead console is there, but more setting I need to mess with…
I’ve been wondering what that door button is for, so that button is for that Toyota light feature?
 
This car is impossible to drive if you smoke and it's raining.
That's why had to purchase rain visors.
And FE carpet floor mats are not for rainy weather as well... So bought rubber.
Attaching PNs.
Will take a picture after installation if interested...
Yes the rain just pours right in
 
Can you elaborate on how you removed the existing lights from the door? I ordered the same thing from Amazon and there was supposed to be a tool included...what I got looks nothing like the video example, so I wanted to make sure on how to remove the existing lights to replace. Any help is appreciated!
The tool is just a little flat head screwdriver to pop them out . They come out easy. Just gently put the screwdriver in one side of the light pop it out then it comes right out then just install the new one .
 
Can you elaborate on how you removed the existing lights from the door? I ordered the same thing from Amazon and there was supposed to be a tool included...what I got looks nothing like the video example, so I wanted to make sure on how to remove the existing lights to replace. Any help is appreciated!
The tab for the door light is on the forward edge (Front bumper) If you look at your new lights you will be able to see where it's located. Plastic trim tool or a very thin bladed screw driver with something to protect the door panel when you pry (I use a piece of plastic cut out of a plastic milk jug). Or you can remove the two screws from the door pull handle area and pop the bottom edge for the door panel out about 2-3 inches reach up inside to push the light out.
 
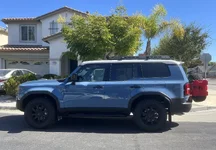
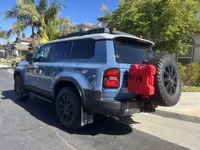
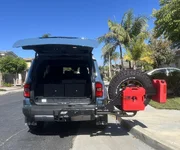
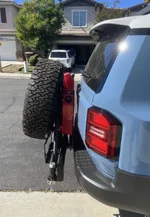
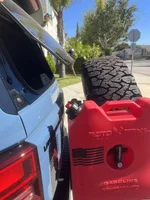
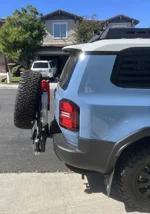
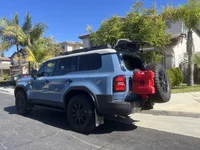
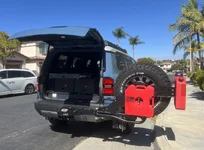
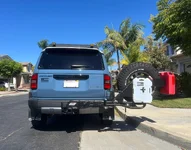
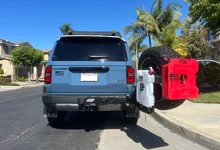
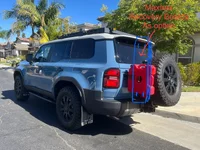
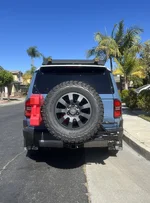
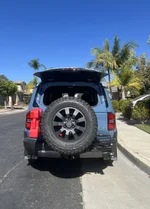
Few more photos after I organized this tire carrier with Rotopax (extra fuels + water). This setup is only needed for my off-road trips. In town, I just have spare tire at OEM location.

Try to have many angled shots so hope to clear out your questions
 

Attachments

  • IMG_7579.webp
    IMG_7579.webp
    354.8 KB · Views: 426
  • IMG_7580.webp
    IMG_7580.webp
    439.6 KB · Views: 423
  • IMG_7585.webp
    IMG_7585.webp
    379.1 KB · Views: 416
  • IMG_7598.webp
    IMG_7598.webp
    294.6 KB · Views: 414
  • IMG_7599.webp
    IMG_7599.webp
    205.8 KB · Views: 393
  • IMG_7593.webp
    IMG_7593.webp
    301.1 KB · Views: 388
  • IMG_7602.webp
    IMG_7602.webp
    436.5 KB · Views: 395
  • IMG_7587.webp
    IMG_7587.webp
    273.6 KB · Views: 378
  • IMG_7592.webp
    IMG_7592.webp
    342.4 KB · Views: 375
  • IMG_7591.webp
    IMG_7591.webp
    293.4 KB · Views: 356
  • IMG_7580.webp
    IMG_7580.webp
    447.6 KB · Views: 355
  • IMG_7583.webp
    IMG_7583.webp
    344.8 KB · Views: 344
  • IMG_7600.webp
    IMG_7600.webp
    299.1 KB · Views: 424
Last edited:
Installed the FitCamX front camera last week with ease. Today, I tackled installing the rear camera and running it through the rear lid for a cleaner look without a cable hanging from the top to the lid. Was not easy fishing the cable through that rubber tube. Packed with wires. I might drill a hole and make it even more cleaner looking.

Also did not want that double stack look under the rear view camera, so I mounted it on the side. Still gives a good wide angle view of the rear. Very satisfied!
Thanks for sharing on th camera figment for the rear. Currently looking at this dashcam setup. How are you liking it? Does it still give the OEM look in the front. Debating on this fitcam or the Toyota camera.
 
How did you get the old caps off? Did you have to remove the wheel? The heritage looks way better!
Any suction cup. I used the one which hold my wife phone to windshield…and 💥 all done in couple minutes ;)
Others proposed complexity methods
 
The tab for the door light is on the forward edge (Front bumper) If you look at your new lights you will be able to see where it's located. Plastic trim tool or a very thin bladed screw driver with something to protect the door panel when you pry (I use a piece of plastic cut out of a plastic milk jug). Or you can remove the two screws from the door pull handle area and pop the bottom edge for the door panel out about 2-3 inches reach up inside to push the light out.
Thank you!
 
Didn’t it already come with one?
Yes... but the stock skid plate is a super thin piece of metal that is more of a gravel gaurd than anything. you can bend it by hand if you realy want. This is a thick piece of aluminum that doesnt flex at all.
 
Gotta get one first! The dealership owner took their 1st Edition. 1958 incoming, but want a LC trim with the Premium Package.
The premium package is awesome. Worth holding out for.
 
Supporting Vendors View all →
M&R Automotive
Back
Top Bottom