I spent a few hours installing some NVX CLD in the doors of my LC250 a few days ago. The doors have never sounded particularly solid when I close them (unlike the GX550 doors) and I wanted to add some sound deadening both to reduce NVH and improve the sound of the speakers slightly. The short version is that I am 100% pleased with the installation. The doors feel more solid (the CDL adds mass to the door), sound more solid on closing, and the sound coming from the door speakers has less tinny resonance. For me, this falls under the "highly recommended" mods for our beloved LC250. One sidenote - I highly recommend the NVX CLD as the best bang for the buck on the market. You can spend more (Resonix), but the NVX stuff is legit (long story short, this is based on actual testing of CLD. The Resonix website is full of detailed test information on CLD.)
In the video below the front door has sound deadening, but the rear door does not.
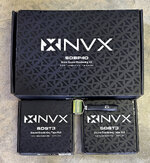
I used just four pieces of 18" x 32" NVX sound deadening. You can buy in either a 5-piece kit or a 9-piece kit. You should also buy at least two rolls of butyl rubber sealant, which I found is more useful than I realized. You also need a good roller to install the sound deadening on the door (do not buy the heavy duty roller!) You will also need a sharp utility knive (change the blade frequently!), straightedge, and something to clean the surface before applying the NVX (like CarPro Eraser or GTechniq Panel Wipe). I bought the 9-piece kit, two rolls of butyl rubber sealant, and the roller for $131. However, I now have 5 pieces of NVX left over. If you only want to do the doors, then only get the 5-piece kit. I'll think about installing some of the CDL in the lift gate, but will likely just sell the left over material.
Removing and re-installing the door cards is the toughest part of the job. Here is a link to a video showing how to do the front door cards. I did not find a video showing how to remove and reinstall the rear door cards (tougher than the front ones!), but thanks to @EOD Guy, the TIS is attached below. I would remove the puddle lights at the bottom of the door prior to removing the door cards. The hint on the rear door disassembly is that when I removed the rear door card, the window seals came with the door card. You should carefully remove the window seals from the door card and re-attach them to the door before attempting to re-install the door card. In addition, the door handle is more difficult to align and install properly on the rear door. Maybe someone wants to make a video showing how to do this?
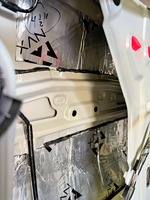
Here are some pics showing where I installed the CDL and butyl rubber. You can get substantial improvement applying the CDL to as little as 30% of the door. In general, it is much better to use one large piece as opposed to several small pieces. I chose to only cover large areas of flat sheet metal and I'm pleased with my results.
1. Front door after door card removal.

2. Remove black plastic panel and speaker to expose the interior side of the exterior panel.

3. Cut and install four pieces of CDL in the door.


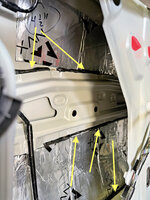
4. Here's a pic with some arrows pointing out places to install the butyl rubber rope. The rope is a perfect dampener between pieces of metal that are joined together.

5. I installed one small piece on the inner side of the inner sheet metal. I wasn't sure where I could install the CLD without interfering with the door card, so I was conservative with my placement. The CLD is in the lower center part of the door.

6. Rear door pics. The sealant on the plastic moisture barrier is butyl rubber rope. If needed, you can always use some of your rope to reinstall the moisture barrier. I did not need to do so. I installed three pieces on the rear door - bottom, middle, and top. I could not get a good picture of the top piece, but you can see it in the last pic.


I didn't take as many pics of butyl rubber, but it installs in the same type of locations as on the front door. Here is a pic showing it installed along the crash bar.

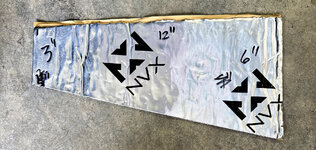
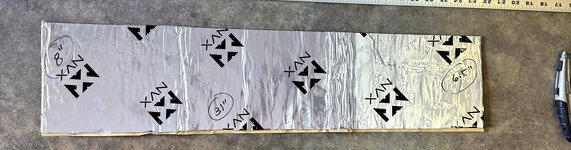
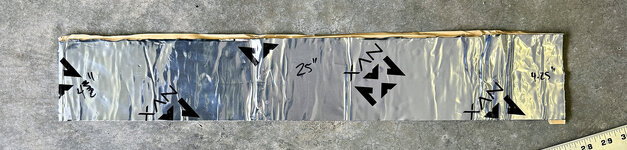
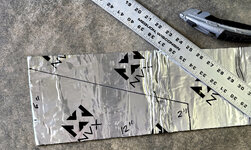
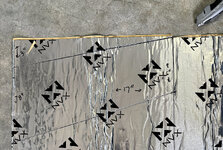
I've also attached some pics at the end showing the sizes of pieces I cut (which may be helpful to some.)
In the video below the front door has sound deadening, but the rear door does not.
I used just four pieces of 18" x 32" NVX sound deadening. You can buy in either a 5-piece kit or a 9-piece kit. You should also buy at least two rolls of butyl rubber sealant, which I found is more useful than I realized. You also need a good roller to install the sound deadening on the door (do not buy the heavy duty roller!) You will also need a sharp utility knive (change the blade frequently!), straightedge, and something to clean the surface before applying the NVX (like CarPro Eraser or GTechniq Panel Wipe). I bought the 9-piece kit, two rolls of butyl rubber sealant, and the roller for $131. However, I now have 5 pieces of NVX left over. If you only want to do the doors, then only get the 5-piece kit. I'll think about installing some of the CDL in the lift gate, but will likely just sell the left over material.
Removing and re-installing the door cards is the toughest part of the job. Here is a link to a video showing how to do the front door cards. I did not find a video showing how to remove and reinstall the rear door cards (tougher than the front ones!), but thanks to @EOD Guy, the TIS is attached below. I would remove the puddle lights at the bottom of the door prior to removing the door cards. The hint on the rear door disassembly is that when I removed the rear door card, the window seals came with the door card. You should carefully remove the window seals from the door card and re-attach them to the door before attempting to re-install the door card. In addition, the door handle is more difficult to align and install properly on the rear door. Maybe someone wants to make a video showing how to do this?
Here are some pics showing where I installed the CDL and butyl rubber. You can get substantial improvement applying the CDL to as little as 30% of the door. In general, it is much better to use one large piece as opposed to several small pieces. I chose to only cover large areas of flat sheet metal and I'm pleased with my results.
1. Front door after door card removal.
2. Remove black plastic panel and speaker to expose the interior side of the exterior panel.
3. Cut and install four pieces of CDL in the door.
4. Here's a pic with some arrows pointing out places to install the butyl rubber rope. The rope is a perfect dampener between pieces of metal that are joined together.
5. I installed one small piece on the inner side of the inner sheet metal. I wasn't sure where I could install the CLD without interfering with the door card, so I was conservative with my placement. The CLD is in the lower center part of the door.
6. Rear door pics. The sealant on the plastic moisture barrier is butyl rubber rope. If needed, you can always use some of your rope to reinstall the moisture barrier. I did not need to do so. I installed three pieces on the rear door - bottom, middle, and top. I could not get a good picture of the top piece, but you can see it in the last pic.
I didn't take as many pics of butyl rubber, but it installs in the same type of locations as on the front door. Here is a pic showing it installed along the crash bar.
I've also attached some pics at the end showing the sizes of pieces I cut (which may be helpful to some.)
Attachments
-
REAR DOOR- DISASSEMBLY.pdf5.2 MB · Views: 13
-
REAR DOOR- REASSEMBLY.pdf6.3 MB · Views: 15
-
 1748440436301.png3.1 MB · Views: 11
 -
 IMG_6893_LC-NVX.jpg423.2 KB · Views: 11
 -
 IMG_6884_LC-NVX.jpg232.8 KB · Views: 11
 -
 IMG_6885_LC-NVX.jpg237.1 KB · Views: 11
 -
 IMG_6879_LC-Butyl.jpg368 KB · Views: 11
 -
 IMG_6890_LC-NVX.jpg572.6 KB · Views: 12
 -
 IMG_6896_LC-NVX.jpg536.7 KB · Views: 12
 -
 IMG_6899_LC-NVX.jpg532.4 KB · Views: 14
Last edited:


