Slee Rock Sliders

Just wondering if you have figured out the connectors. I received my Slee sliders and installed them this week. Installing the light kit is next. I really don’t want to cut the connectors off the running boards. I’ll probably end up selling those.

Bob
I'll try to respond tomorrow, but the short answer is that I did not install the lights yet. However, between myself and two other members, I believe we do have a workable solution that utilizes the OEM connectors. Definitely don't remove the connectors from the running boards!
 
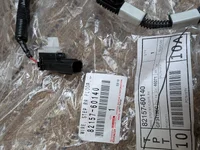
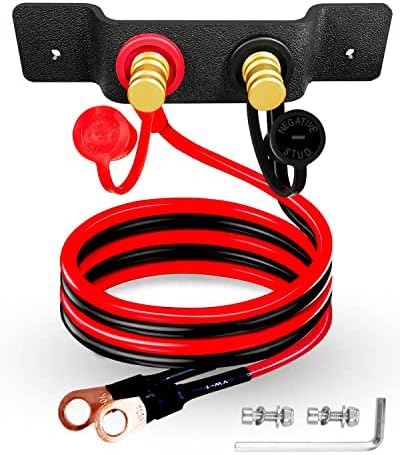
I bought 2 of these with the intention of splicing the wires from the Slee lights into it to use the connector. Haven't done it yet but I think it should work!
 

Attachments

  • PXL_20250530_163708060.MP.webp
    PXL_20250530_163708060.MP.webp
    325.2 KB · Views: 304
I bought 2 of these with the intention of splicing the wires from the Slee lights into it to use the connector. Haven't done it yet but I think it should work!
I bought these as well to connect the Slee light kit as well. It does work. But as noted in a previous post, they are not very bright, but it's enough light for me.
 
I bought 2 of these with the intention of splicing the wires from the Slee lights into it to use the connector. Haven't done it yet but I think it should work!
that's exactly what I'm going to do! It took a bit to get them, but I have them now.
 
I just installed these and I found the stick nuts to be a giant pain. I'm glad others are doing ok with them.

The pictures are super helpful. Thank you!
 
I just installed these and I found the stick nuts to be a giant pain. I'm glad others are doing ok with them.

The pictures are super helpful. Thank you!
The stick nuts were not difficult for me to use. What made it difficult for you?
 
The stick nuts were not difficult for me to use. What made it difficult for you?
Getting the things bent just right so they would align with the hole flat. There is a joke in there somewhere. :D

The slider had a pretty good gap too that I needed a jack to push it up just the bolts would start. Maybe if the bolts were a little longer it would have been easier for me. Heck maybe it's just me and I suck. :)
 
Getting the things bent just right so they would align with the hole flat. There is a joke in there somewhere. :D

The slider had a pretty good gap too that I needed a jack to push it up just the bolts would start. Maybe if the bolts were a little longer it would have been easier for me. Heck maybe it's just me and I suck. :)
More than likely the weld on the frame needed to be ground down a little bit to make it fit better. I managed to install both of my sliders without any grinding, but that can be an issue depending on the amount of excess weld. I had a friend help me install the sliders - it's pretty tough to do by yourself.
 
More than likely the weld on the frame needed to be ground down a little bit to make it fit better. I managed to install both of my sliders without any grinding, but that can be an issue depending on the amount of excess weld. I had a friend help me install the sliders - it's pretty tough to do by yourself.
Good point, I didn't think of that. Had plenty of help from my wife :)

It's done but yeah that part was pretty rough.
 
Getting the things bent just right so they would align with the hole flat. There is a joke in there somewhere. :D

The slider had a pretty good gap too that I needed a jack to push it up just the bolts would start. Maybe if the bolts were a little longer it would have been easier for me. Heck maybe it's just me and I suck. :)
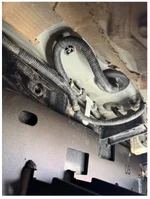
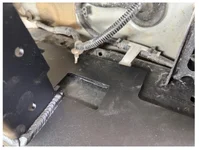
There was a single plastic piece left in the frame that was not obvious to me when I installed mine, and it was NOT listed as to be removed in the directions. The slider would not mount/line up correctly until that piece of plastic was removed, although the slider could get mounted with some space due to the plastic being crushed between the slider bracket and frame. It only just barely was sandwiched in there, and when installing it wasn't obvious that it would be in the way. I brought it in and Slee found the issue and removed the plastic bracket (that I did not even know was there!), and then it sat flush with the frame. It was on the rear driver side, pictures below.

I suggested they add it to the detailed directions, not sure if they did.

Screenshot 2025-11-24 at 09.03.57.webpScreenshot 2025-11-24 at 09.03.11.webp
 
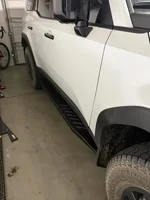
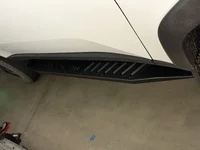
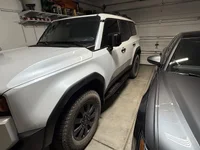
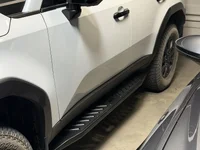
I installed Slee Rock Sliders on my Heritage Blue LC250 last week. The fit and finish of the sliders is excellent. No drilling or modification is required to mount these sliders to the LC. All of the bolts (M10 and M8) use existing weldnuts installed by Toyato on the frame except for two. The remaining two bolts use sticknuts and were very easy to use (the instructions make it quite simple to use the sticknuts!) The instructions were straightforward and easy to follow. I'm going to install the light kit, but I'm working out some details to try and use the Toyota connector that is also used to power the lights on the OEM running boards. If you're thinking about sliders and want something thats both functional and more subtle than the tubular sliders, then these are an outstanding option. Slee has great customer service (thanks Amory!) Slee is also coming out with skid plates soon. Here's some pics of the sliders...

(Method 703, 17" +35 in gloss titanium wrapped in Falken WildPeak AT4W 255/80R17)

View attachment 25381


View attachment 25382
View attachment 25383

View attachment 25385
View attachment 25386
View attachment 25387
View attachment 25388
View attachment 25392
This rig looks terrific. I want those wheels this spring! I stopped at Slee today and asked them about them and they had these on a LC on the floor. I didn't ask them to unlock the car but you mind commenting on the length for the back door. Does it stop too short to be useful as a step for rear passengers? On the LC in the shop it looked like it may but the only way to really tell is open the door. For me it's between these and the RCI's. The RCI's are cheaper and I like the kick out in the back but these Slees look so nice and clean - and they have a lighting option.
 
This rig looks terrific. I want those wheels this spring! I stopped at Slee today and asked them about them and they had these on a LC on the floor. I didn't ask them to unlock the car but you mind commenting on the length for the back door. Does it stop too short to be useful as a step for rear passengers? On the LC in the shop it looked like it may but the only way to really tell is open the door. For me it's between these and the RCI's. The RCI's are cheaper and I like the kick out in the back but these Slees look so nice and clean - and they have a lighting option.
I have them installed and I'd say it works as a step still, but it's not ideal. Even if they didn't do a kick out, if they had done a shorter taper it would have been better. Other than that I've been very happy with them.
 
This rig looks terrific. I want those wheels this spring! I stopped at Slee today and asked them about them and they had these on a LC on the floor. I didn't ask them to unlock the car but you mind commenting on the length for the back door. Does it stop too short to be useful as a step for rear passengers? On the LC in the shop it looked like it may but the only way to really tell is open the door. For me it's between these and the RCI's. The RCI's are cheaper and I like the kick out in the back but these Slees look so nice and clean - and they have a lighting option.
The step is full width under the door sill and tapers back from there. If you put your foot down in the right place (under the door sill), then you'll have a full width. If you aren't paying attention and rotate your body and step out towards the rear, you might land on the much narrower tapered portion of the step. I always teach people how to use the steps and grab handles to enter and exit the truck (use the interior hand to grab the handle, step up with your exterior foot, then climb in. Reverse the process to get out - step out backwards.) I have not had anyone slip on the rear portion of the step.

The Slee steps are exceptionally well made. I've purchased a few parts from RCI Offroad (front and rear lower link skids and rear shock skids) and was less impressed with them (not bad, but not the same level of quality and attention to detail). Based on this experience, I'd pick Slee every time.
 
Last edited:
The step is full width under the door sill and tapers back from there. If you put your foot down in the right place (under the door sill), then you'll have a full width. If you aren't paying attention and rotate your body and step out towards the rear, you might land on the much narrower tapered portion of the step. I always teach people how to use the steps and grab handles to enter and exit the truck (use the interior hand to grab the handle, step up with your exterior foot, then climb in. Reverse the process to get out - step out backwards.) I have not had anyone slip on the rear portion of the step.

The Slee steps are exceptionally well made. I've purchased a few parts from RCI Offroad (front and rear lower link skids and rear shock skids) and was less impressed with them (not bad, but not the same level of quality and attention to detail). Based on this experience, I'd pick Slee every time.
I bought em today. It was between the RCIs and the Slee and I like the look of them both. The Slee slider, while much more expensive, has such a nice clean look and the lighting option. I’m hoping that they figure out the electrical connections so it’s plug and play! I’m not spinning around rocks and using the slider as a pivot point or anything like that. I need rocker panel protection for those instances when I will scrape. These will get that done and they looked great in the shop yesterday.
 
My Slees are in! Hoping to pick them up next week and get them on before the end of the year. Has anyone figured out the wiring harness yet? I bought the light kit and have the running board lights now.
 
We had a whole thread (linked below) where we went through how to do this. None of us has Slee sliders, but I used their light kit. Follow our instructions for the wiring guides and use the Slee instructions for attaching the lights. And you should be good to go.

Unless you love electrical work, I would buy the Toyota harnesses mentioned in the thread instead of trying to fab your own like I did. It can get tedious trying to insert pins properly in the harnesses.

Thread 'Running board lights'
Running board lights
 
@uraniumrich do you need the female or male pins and for which connector the forward three pin or aft two pin?

I’m out of town till next week for work but if I have what you need I’ll give them to you for cost of shipping.

FYI the factory connections won’t provide full brightness to any light as it’s not a traditional +12VDC and ground but rather both pins are +12VDC when off and one drops to about +3-3.5VDC when on.

I wired mine into the dome light and they work like OEM for all functions when door linked interior lighting is selected and work at full brightness this way. There is a pass through under the drivers and passengers seat to run wires from inside to outside just behind outside forward edge of seat slide rails.

If you deselected door linked lighting button they no longer come on like OEM and if you turn on interior lights via the button next to door linked button they will come on until turned off or the power cut time out occurs.
Thanks for this. I want to make sure I’m clear. Are you saying that if I use the harness that the current running boards are plugging into that they will not produce much light? Tx.
 
Thanks for this. I want to make sure I’m clear. Are you saying that if I use the harness that the current running boards are plugging into that they will not produce much light? Tx.
Yes, they will not provide the lights full potential since the OEM harness only produces 9VDC (12VDC on the positive side and 3VDC on the negative side) vice 12VDC (True Battery power and ground). The OEM harness provides a constant 12VDC on the positive side and varies the voltage on the ground side from 12VDC (Lights off) to 3VDC (Lights on).
 
There was a single plastic piece left in the frame that was not obvious to me when I installed mine, and it was NOT listed as to be removed in the directions. The slider would not mount/line up correctly until that piece of plastic was removed, although the slider could get mounted with some space due to the plastic being crushed between the slider bracket and frame. It only just barely was sandwiched in there, and when installing it wasn't obvious that it would be in the way. I brought it in and Slee found the issue and removed the plastic bracket (that I did not even know was there!), and then it sat flush with the frame. It was on the rear driver side, pictures below.

I suggested they add it to the detailed directions, not sure if they did.

View attachment 53560View attachment 53561
They did not add it to the directions. I was installing these myself and I had to pull that one back down after I already had it up, remove that piece of plastic (I also had a wire there) and then it sat flat. The stick nuts took me a while to figure out, as I couldn't tell from the picture that the actual "nut" went inside. Once I figured that out I was good there. But a difficult install for me installing alone. One other person to do some balancing would have been helpful.

Here is mine, completed yesterday. I really like the look of these and have since the OP started this post. I'm glad I went with these ones. They are stout.
 

Attachments

  • IMG_5290.webp
    IMG_5290.webp
    112.3 KB · Views: 166
  • IMG_5282.webp
    IMG_5282.webp
    72.6 KB · Views: 151
  • IMG_5289.webp
    IMG_5289.webp
    185.7 KB · Views: 146
  • IMG_5288.webp
    IMG_5288.webp
    136.6 KB · Views: 152
Supporting Vendors View all →
Back
Top Bottom