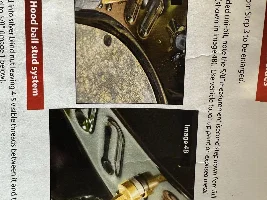
Where did you run the wires, and get power from. Do you like it?Future under-hood utility light.
Follow along with the video below to see how to install our site as a web app on your home screen.
Note: This feature may not be available in some browsers.
Where did you run the wires, and get power from. Do you like it?Future under-hood utility light.
I haven't installed it yet, but on the list....... I'll connect the power to a "accy" empty fuse slot in the Dvr's side fuse box. Run the wires from the box back to the cowl, follow the hood hinge up to the center of the hood. I haven't checked yet if the hood/braces are steel or alum, if they are alum I'll panel bond a piece of steel to the under side, my plan is to mill a base out of some 1/2" plastic sheet with some very powerful magnets countersunk into the mount, then bolt the light to the mag mount. My intent is to allow the light to be easily moved if needed for better angles during roadside repairs etc.........Where did you run the wires, and get power from. Do you like it?
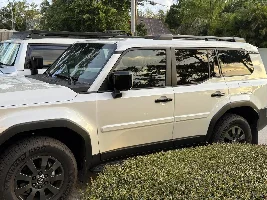
Thanks! I might give these a shot Amazon.com and mount them where @PurelyAbrasive mounted his DD's (I can't afford DD's): Adding extra backup lights utilizing the 7-Pin trailer connectorOrig thought I'd mount them to the underside of the roof spoiler, but spoiler is a little flimsy and worried about breaking the glass, but they might work for some roof rack side lights
Orig thought about mounting below the bumper....... looked out of place.
Way too big
Slightly too big (I was hopeful)
Hopeful these can be trimmed to fit the space available
Future under-hood utility light.
I think I finally found some that will fit ......Thanks! I might give these a shot Amazon.com and mount them where @PurelyAbrasive mounted his DD's (I can't afford DD's): Adding extra backup lights utilizing the 7-Pin trailer connector
They look super bright from the review photos. Interested in how they look if you end up going with them.
Hopefully they'll work as my collection of lights is getting out of hand......lolThey look super bright from the review photos. Interested in how they look if you end up going with them.
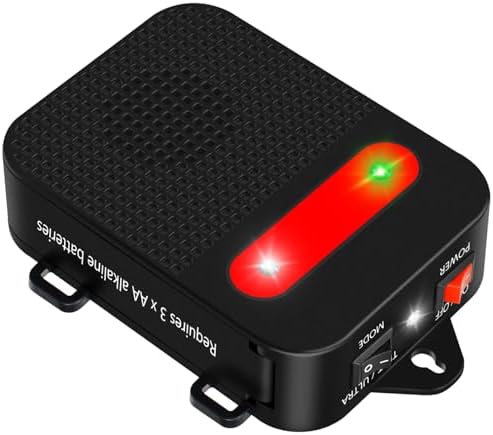
On my Tacoma, for the engine bay light, I install one of this (link). So when I open the hood light turns on, when I close it lights turns off. You can connect directly to the + terminal. It works great for my needs.I haven't installed it yet, but on the list....... I'll connect the power to a "accy" empty fuse slot in the Dvr's side fuse box. Run the wires from the box back to the cowl, follow the hood hinge up to the center of the hood. I haven't checked yet if the hood/braces are steel or alum, if they are alum I'll panel bond a piece of steel to the under side, my plan is to mill a base out of some 1/2" plastic sheet with some very powerful magnets countersunk into the mount, then bolt the light to the mag mount. My intent is to allow the light to be easily moved if needed for better angles during roadside repairs etc.........
I thought about putting a tilt switch on the light, but eventually decided to go with a "accy" only power source and a physical switch on the light it's self. I remember one particular vehicle with an under-hood light with a tilt switch, never used it for 3+ years and the one time I needed it, the switch failed and I ended up cutting the switch out and hard wiring it so I could complete the road-side repair.On my Tacoma, for the engine bay light, I install one of this (link). So when I open the hood light turns on, when I close it lights turns off. You can connect directly to the + terminal. It works great for my needs.
Amazon.com: Pactrade Marine 4pcs Truck Hood Door Car Alarm Security Adjustable Pin Switch : Automotive
Buy Pactrade Marine 4pcs Truck Hood Door Car Alarm Security Adjustable Pin Switch: Accessories - Amazon.com ✓ FREE DELIVERY possible on eligible purchaseswww.amazon.com
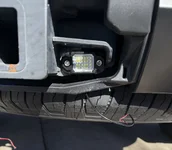
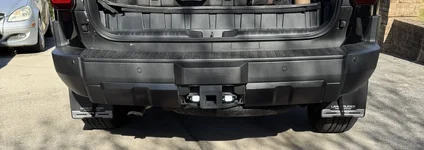
I found some that fit very well in that space! Not finished yet, but here's the fitmentI hear you. There are two holes on the hitch suitable for lights if I can find bright one that fit in that space.
Looking good. I suppose ANY extra light is better but, do you think these provide the brightness you seek? I bought these and these fit OK, they hang a bit lower. I’ll take some pics later and share. My plan is to install a “two way in & one way out diode” in case I add a switch to these lights later on.I found some that fit very well in that space! Not finished yet, but here's the fitment
View attachment 52928
View attachment 52929
That is my concern, if they will add meaningful illumination........ should finish the wiring this afternoon and test this evening. If it's a fail, I'll go a different route.Looking good. I suppose ANY extra light is better but, do you think these provide the brightness you seek? I bought these and these fit OK, they hang a bit lower. I’ll take some pics later and share. My plan is to install a “two way in & one way out diode” in case I add a switch to these lights later on.
You might consider using a relay that would switch between the +12v wire and the reverse wire from the 7 pin connector. In resting mode the relay's NC (87a) terminal connected to the rev (white) wire, the NO (87) terminal connected to the +12v (Vlack) wire and the Comm (30) connected to the lights. The relay powered by a separate dedicated switch etc.........Looking good. I suppose ANY extra light is better but, do you think these provide the brightness you seek? I bought these and these fit OK, they hang a bit lower. I’ll take some pics later and share. My plan is to install a “two way in & one way out diode” in case I add a switch to these lights later on.
The 7-pin adapter is tucked up behind the spare tire. It’s the adapter that came with the DD hitch light. I used that and a Y splitter.Is the 7-pin adapter not connected in your picture with the light off or did you tap into it from behind?
Nice!!! I like the outcome.I finished the wiring today, turned out pretty slick.
I removed the Trailer plug from the bracket to make it easier for what I wanted to do.
I de-pinned the center connector from the Toyota plug (Yellow wire is the Reverse wire)
I fed a new "red" wire through the OEM weather seal and securely wrapped it around the yellow wire's connector/terminal. I purposely did not solder it for future me modifications.
View attachment 53017View attachment 53018
I fashioned an alignment tool by flattening a piece of alum wire (this is a MUST) to align the very awkward terminal back into the Toyota socket. Simply insert the flattened part of the wire int the Yellow/red terminal and feed it back into the housing. It will only fit back in one way without forcing it.
View attachment 53020
I don't have a before pic.....sorry. I'm happy with the results.
View attachment 53039View attachment 53038
I just received the same ones and have plans to add them to the ones already installed. Just waiting for the rain to go away......received these and it is an acceptable fit. I plan on installing over the weekend, will post results. Amazon.com