🛠️ Member Build Jake’s Cruiser

Member Build
I think they work pretty good, only thing is they come in two sets, so you’ll have to splice into the first set to power it, disconnect the last light in the powered strand and take apart the 2nd strand so you can keep connecting them into a longer strand… assuming you want to cover the whole rig with just one strand.
Did cut/mount the lights onto the liner or on the exposed frame behind the wheel?
 
The jackers raise it, or at least with the height of mine (I use all the jacker pieces) high enough for it to slide out actually, if I slam the brakes it’ll slide out and I don’t know what you mean by delete
Did your LC come with a roof rack? If you removed it, how did you fill in the gaps left behind? Also, where'd you get those window visors?
 
Did your LC come with a roof rack? If you removed it, how did you fill in the gaps left behind? Also, where'd you get those window visors?
Gotcha, no mine did not come with one, and I’m assuming it would depend on the roof rack, but you’ll probly end up cutting that weather strip away anyway. But I’ve checked with Toyota on that just cuz I felt icky cutting mine, and as usual it’s ridiculously high price tag, but not too terrible considering… I think it was like $200 a side or something. And the window visors I got onnnnnnn Amazon I think, I don’t remember the company or anything but they’re just the stick on kind.
 
Did cut/mount the lights onto the liner or on the exposed frame behind the wheel?
I keep everything on frame or body whenever possible… I’d have to go out and give a peek at where I ended up mounting them behind the wheels
 
All right, well here’s what I’ve done so far, and if anybody’s got questions or wants a more specific picture or how I did something, just reach out. Cheers y’all!

-Tinted windows, 15% all around and 70% on the windshield. Probably illegal in most places but it is what it is.

-Tire upgrade to Falken Wildpeak 285 70/R17. I don’t remember what specific method wheel it is, but obviously the coolest ones. It has a zero offset. I used to rub a tiny bit but I adjusted my alignment and that’s gone. It should be pointed out that this setup has a very aggressive stance with a few inches of poke.
View attachment 26793
View attachment 26795

-Rago fab front bumper. Relatively difficult install only because of how tricky it is to remove everything and then get it all back together. There are many steps/ pieces to disassemble the front end. ORGANIZATION IS KEY HERE. Set everything out and label the pieces as you go. I did not do that and I spent probably an extra 2 hours trying to figure out what screws/ pushpins went where and why I have so many pieces left over. Learn from my mistakes! Also bear in mind, there is cutting involved in this, and perhaps a little fine tuning once you go to install the bumper itself. Take your time to do it right.
View attachment 26798
View attachment 26801

-12,000lb Badlands winch with synthetic line.
- IMPORTANT NOTE
-YOU CANNOT POWER THIS OFF THE BATTERY UNDER THE HOOD. I had a hiccup with my father when testing the winch and it ultimately blew a fuse back on the 12v battery that completely killed the truck. Zero power to anything. That fuse link is irreplaceable without spending a few thousand dollars. If you’re curious as to how I ran my current setup back to the 12v, please reach out, I’d be more than willing to show you what I did. DONT MAKE MY MISTAKE!!!


- Extreme LED 30” amber light bar. I ran this straight to a deep sea fuseblock. Pretty straightforward.

View attachment 26805

-Rock lights- I use some cheap Amazon Chinese ones that just clip together. I love these because they’re laughably cheap and relatively durable, but when one goes out, it’s super easy to just change the one that’s out (like a Xmas tree light). You will still have to splice the first light section to power it, but that’s it. Every light downstream of that is isolated by two connectors, one on each end. The only issue is they come in sets of two, with one strand ending at the light itself. So to get full coverage of the vehicle, I had to use four total strands to create one long strand. If this doesn’t make sense, message me and I’ll get more specific.
View attachment 26809


- A few quick notes on my wiring:
- winch is wired to a 300amp breaker, and then to a disconnect (physical hand breaker), and then directly to the 12v starter battery. From my research anything over 9,000lbs will draw 350amps and higher, I don’t plan to ever winch something that heavy, and if I’m unsure I’ll swap to double line pull anyway, but I might need to swap that breaker out for something larger, but again, winch is for emergency’s and I don’t plan to use it often, just nice to have.
-light bar and rock lights are wired to a blue sea fuse block. The fuse block itself is powered off one of the two terminals from the hood battery with an inline fuse (both are constant hot). I wired things to allow constant power to the light bar and rock lights. This is obviously not ideal for some, but I’ve always found it helpful to get lights without turning on the truck. Any questions and I’ll be glad to provide pictures or advice or whatever.


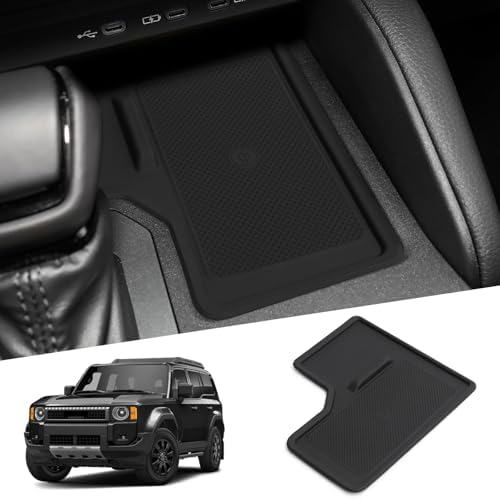
-Swapped out the center console tray. I went through probably 3 of these before I found this one, it’s got a double tray (so technically 3 separate storage spots), and it came with the little hideaway part for the upper cubby area in the armrest itself. I’m very pleased with it. Found on Amazon. LUWU for Toyota Land Cruiser... Amazon.com


View attachment 26816


-Seat jackers by desertdoesit because my back is terrible and they really do help a lot, for me at least. Easy install. Very straightforward.
View attachment 26817


-I mounted a Blackhawk holster on the passenger side for my SIG P365. I like having it there because I can still use the retention clip and it’s not plainly obvious to someone near the driver’s side. Without going fully down the rabbit hole of conceal carry firearms and everybody’s very intense opinions… I have always concealed carry, and I appendix carry. This is, for me, impractical and uncomfortable when driving. I like having my firearm within reach but I like knowing it won’t go flying around the cab in an accident. I also have a lockbox for when I can’t carry wherever it is that I might be going. The lockbox stays tucked away nicely under my seat. I put the holster in the passenger seat rear pocket. Again, comfortable for me to reach if I need my spare magazine or before I get out of the truck. This is simply what works best for me, whatever works for you, great. Shooters preference.
Side note- this was the first mod I did, and if the molle panels existed at that time, I would have installed them, and the holster to that. So I have more molle panels to install in the near future.😁
View attachment 26818
View attachment 26819


-Victory 4x4 molle shelf in the bed. Easy install and I LOVE it. It bolts right into the slots where the rear grab handles are, solid construction and the options are limitless.
View attachment 28534
View attachment 26827


-Stickerfab topo stickers here and there, not sure if that counts as a mod, but I’ve worn a hardhat most of my life… so I like stickers.
View attachment 26828
View attachment 26829
View attachment 26830


-Seat gap filler cushions. I tried a few of these as well. These ones I liked the most and honestly I was just tired of ordering $20 things on Amazon and thinking “ehh not perfect.” These have a little slot that I keep small bills in, and a cup holder option. I keep the cup holder on the wife’s side since she always has 11 beverages with her. Drivers side butts up nicely to a separate storage pocket thing that I saw on EOD guys build. I believe he hard mounted his, but I’ve had zero issue so far with just the 3m tape it comes with. Both of which can be easily found on Amazon and I believe I’ve linked it below somewhere.
View attachment 26840
View attachment 26841

-Wireless charger that I found on Amazon since the 1958 doesn’t have one. This one fits the space almost perfectly and it’s convenient in conjunction with the magnetic charging mount. I also got one of the wireless pad things and cut it to fit the space so things don’t slide around. Wireless charger I got from Amazon, I’ll try and find the link, and the magnetic mount I got straight from Verizon.
View attachment 26836
View attachment 26837

That’s all so far. Side molle panels, fog light upgrade, and roof rack are all on their way, will post updates. Thanks for looking!
Seat gap filler link?
 
Seat gap filler link?
You can find it in conversation earlier on this thread, somebody else asked and I posted it. Not sure if the link is still good because it’s just cheap Chinese Amazon stuff. Easy Amazon search will show something similar I’m sure.
 
Supporting Vendors View all →

Latest Discussions

StickerFab
Back
Top Bottom