๐Ÿ› ๏ธ Member Build Elsie the LC

Member Build
Installed sound deadening mat on the everything behind the front seats except the rear doors and roof(which I'm not planning on doing). Haven't had a chance to drive it yet to see how much of a difference it makes. It BETTER be worth it after the 10 hours of labor that went into it! Also, discovered that it was much easier to just flip the larger portion of the back seat onto the hybrid battery versus taking it all the way out if you just need to get it out of the way to get the carpet up.

1730694687446.png
 
Last edited:
Installed sound deadening mat on the everything behind the front seats except the rear doors and roof(which I'm not planning on doing). Haven't had a chance to drive it yet to see how much of a difference it makes. It BETTER be worth it after the 10 hours of labor that went into it! Also, discovered that it was much easier to just flip the larger portion of the back seat onto the hybrid battery versus taking it all the way out if you just need to get it out of the way to ge the carpet up.

View attachment 16836
Nice job! It looks great. Would love to "hear" (see what I did there) what you think after you drive it. Would have been cool to have done a decibel test before and after...

I'm probably going to do the same thing. Eventually....
 
What relay is that? Can you show a picture of where / how you connected it inside the box?
What relay are you referring to? The red cable coming out of the box is attached to the positive terminal under the cover on one end and then the circuit breaker on the other side.

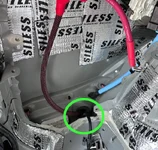
If you take the fuse box cover off and then the cover over the thick cables going down the side, you see 2 terminals and I'm connecting to the one towards the back of the truck. Here's the before picture:

1730774538068.webp


I'll try to get a picture under the box this weekend.
 
Got the wiring completed for the coming winch. I wanted it as clean and safe as possible. Ran 1/0 gauge wire from the battery via 400AMP fuse to the front and terminated at a new "positive terminal".

I fabricated a bracket that attaches to a spare 6mm threaded hole above the battery and to the bolt on the back of the battery bracket. I attached the 400AMP fuse to that bracket and ran the wire to the battery from there:

1749436087768.png


The wire goes from the amp to the exterior of the truck via a grommet that is behind and below the battery itself. The easiest way to get to it is to actually remove the battery and the tray/bracket as well. I've heard from someone with a 1958 Edition that there is nothing going through their grommet, but mine had a small group of wires passing through. I just expanded the hole and pushed the wire through:

1749436317705.webp


You will need to remove the fender flare as well as multiple trim pieced in order to pull the corner of the bumper back in order to access teh grommet. Looks like this from the outside. After this picture, I covered the grommet and wire with "Black Rubber Sealant" from Permatex. I'd never used it before but was impressed with how it went on and how quickly it "set up". It's almost as if I created a new "boot" around the wire.
1749436371960.webp
 
Last edited:
After exiting the vehicle, it goes under the fender and then up and over the wheel well liner and is completely unseen until it exits near the frame. There are some OEM wire bundles running most of the length of the frame so I just zip tied the new wire to them until I got below the firewall. From there it was a quick run up and under the master brake cylinder to the terminal between the brake manifold (?) and the fuse box. Then a short run to the battery shut-off that the winch will be hooked up to eventually.

1749436892882.png


I used the red wire loom for protection but also to make sure it was as clear as possible to anyone working under the hood that there was a high power positive wire in the vicinity. Also, tried to cover any exposed positive touch points to avoid accidental shorting out by laying a wrench down without looking first.
 

Attachments

  • 1749436291722.webp
    1749436291722.webp
    109 KB · Views: 205
Last edited:
Lastly, I trimmed the jack bracket so that I could hopefully reach through to swap out the fuse if it blows without having to take the whole rear panel off in the future.

1749438057276.webp
 
Have you wired up anything to the switch? Curious how you like it and also if you used relays or anything. Let me know what you think.
Just realized I never responded to @Bappy here! Yes, I have my WeBoost and Light Bar hooked up to the switch and it works great. I did not need any relays because the Garmin effectively works as a relay. I'm hopefully going to be wiring up a compressor soon and will hook it up as well. Looking forward to being able to remotely start/stop the compressor from my phone when I'm outside of the vehicle.
 
Added an unorthodox ground distribution block in front of the air box. I have my LED light bars and air compressor hooked up to it for now. I replaced the bolt holding the airbox in place with a slightly longer one and it serves to hold the distribution block and air box in place while also providing the electrical connection to the chassis.

1753567193869.png


1753567140863.png
 
Last edited:
Finally got my DV8 bumper/winch/onboard compressor project finished. I'll create a separate thread for the compressor install since it is unique as far as I know. I'm very happy with the results, both from a functionality perspective as well as a appearances. The DV8 bumper looks stock and I appreciate the clean lines since I'm not going all in with a rock crawler and need maximum approach angles.

Finished
1753757118069.webp


1753757139697.webp


DV8 Bumper with winch and compressor mounted behind the bumper
1753757427785.webp


1753757616036.webp
 
Day 4 - Roof rails and cross bars replaced with a Prinsu. So far, very happy with the rack. No noise to speak of and strong as can be. Install took about 3 hours simply because I was taking my time and being extra careful to not break or scratch anything.

View attachment 7897
Hi, I'm wondering if you still like the Prinsu rack and if there's much noise inside from it. The last roof rack I had on a Yukon was pretty loud
 
Hi, I'm wondering if you still like the Prinsu rack and if there's much noise inside from it. The last roof rack I had on a Yukon was pretty loud
Hey, yeah, I've been pretty happy with it. The noise is not an issue that I've noticed. Honestly, I think the All Terrain tires cover any noise from the rack. My biggest complaint is that the newer design (I had the previous design on my 200 series), while much stronger, also has some drawbacks. The biggest of these, in my opinion, is that you can't remove the crossbars easily. This is because they are mounted below the lip of the rack (see below). In the past, you could remove 2 (or more) crossbars from the rack, attach them to your rooftop tent very easily and then lift the whole assembly onto the top of the vehicle and reattach the crossbars. Now, you have to set the RTT on top of the rack and squeeze your hand under the very low rack to attach the RTT to the crossbars. It's a real PITA.


1770869957014.webp
 
Okay, well thank you for the info. I'll probably go ahead and order the rig with it on. I do want a rack and you seem to hear a few problems with just about any of them.
 
Okay, well thank you for the info. I'll probably go ahead and order the rig with it on. I do want a rack and you seem to hear a few problems with just about any of them.
Donโ€™t get me wrong, I do like the rack over all and itโ€™s very strong. Iโ€™m just โ€œold man grumpyโ€. ๐Ÿ˜
 
Any finished pictures? Would love to see how it looks.

Yeah, I'd love to see the finished product as well. Dogs are the only passengers in my backset so thinking about ir removing seats would be an option.
Hey guys, when I said "temporary", I didn't mean to imply that I was going to do something permanent. I was meaning temporary in that it would go in when I was taking long overlanding trips and then back to "normal" mode when not on those trips. I'm NOT currently planning on building something that involves removing the rear seat, which will stay in 100% of the time. I do carry passengers on occasion so I need the seat.
 
Hey guys, when I said "temporary", I didn't mean to imply that I was going to do something permanent. I was meaning temporary in that it would go in when I was taking long overlanding trips and then back to "normal" mode when not on those trips. I'm NOT currently planning on building something that involves removing the rear seat, which will stay in 100% of the time. I do carry passengers on occasion so I need the seat.
Got it. Thank you very much. Was removing the seats difficult?
 
Supporting Vendors View all โ†’
Back
Top Bottom