3D Printed Accessories

I actually have some others that will fit a suppressor so those would.
You interested in printing and selling one more ? If so, so you think a long gun could be canted just a bit in it ? The shotgun in question is about 1” too long and hits ceiling straight up with extended turkey choke. If I could lean it the least bit left or right, forward or back, it will fit.
 
Last edited:
You interested in printing and selling one more ? If so, so you think a long gun could be canted just a bit in it ? The shotgun in question is about 1” too long and hits ceiling straight up with extended turkey choke. If I could lean it the least bit left or right, forward or back, it will fit.
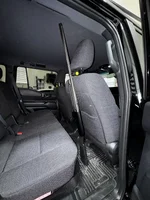
My Benelli M2 fits and it’s 47” long. There is about an 1” between the tip of the barrel and the headliner. You could cant it a little more to have more space. Measure your shot and let me know. I will print you some.
 

Attachments

  • IMG_2123.webp
    IMG_2123.webp
    357 KB · Views: 195
My Benelli M2 fits and it’s 47” long. There is about an 1” between the tip of the barrel and the headliner. You could cant it a little more to have more space. Measure your shot and let me know. I will print you some.
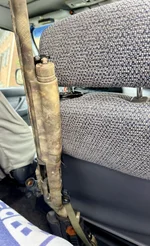
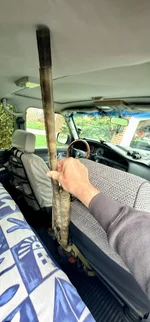
My M1 will fit no problem with its 21” barrel. I need my SBE to fit and it has 26” and Turkey choke. Was going to put it in my ‘92. When I put the gun in there with the butt on floor and the angle the seat is reclined, it just fits. Straight up is a no go. What do you think about where the forearm is as far as attaching barrel to your mount/headrest? If you think it will work, I’ll take two. PM me how much and how to send you money (Venmo, PayPal, etc. ) appreciate you being willing!
 

Attachments

  • IMG_5148.webp
    IMG_5148.webp
    330.8 KB · Views: 164
  • IMG_5149.webp
    IMG_5149.webp
    145.9 KB · Views: 123
My M1 will fit no problem with its 21” barrel. I need my SBE to fit and it has 26” and Turkey choke. Was going to put it in my ‘92. When I put the gun in there with the butt on floor and the angle the seat is reclined, it just fits. Straight up is a no go. What do you think about where the forearm is as far as attaching barrel to your mount/headrest? If you think it will work, I’ll take two. PM me how much and how to send you money (Venmo, PayPal, etc. ) appreciate you being willing!
The larger one I have is a little over 1.5” across so you should be able to fit the forearm in there or rotate it around and put the barrel and rib in the opening. Once these finish printing I will try on my M2 as I am going to have to make the bungee cord a little longer.
 
I came here looking for anyone that might have come up with a source for a GoPro mount that would fit ont the outside mirror. Seems like it would be rather simple to print something that would fit onto the mirror and would accomodate a GoPro mount. I am not a 3D printer/designer so I might be oversimplifying.
 
My M1 will fit no problem with its 21” barrel. I need my SBE to fit and it has 26” and Turkey choke. Was going to put it in my ‘92. When I put the gun in there with the butt on floor and the angle the seat is reclined, it just fits. Straight up is a no go. What do you think about where the forearm is as far as attaching barrel to your mount/headrest? If you think it will work, I’ll take two. PM me how much and how to send you money (Venmo, PayPal, etc. ) appreciate you being willing!
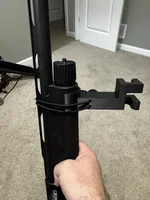
The larger one I have is an 1.5” across so you should be able to fit fine. Here is a photo of the larger one attached to my M2. Just DM me your address and I will get them mailed out this week sometime.
 

Attachments

  • IMG_2126.webp
    IMG_2126.webp
    236.8 KB · Views: 130
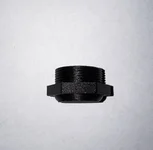
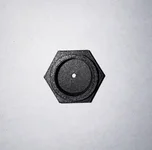
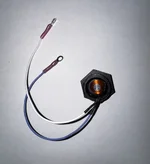
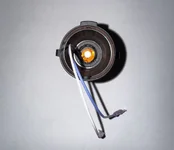
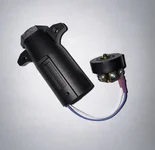
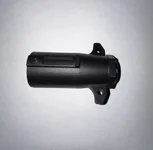
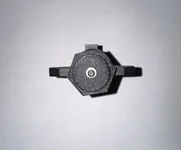
Got creative again today and did my take on @EOD Guy trailer brake emulator so when I put my hitch rack on I don’t get the annoying stuff.
 

Attachments

  • IMG_2164.webp
    IMG_2164.webp
    108.3 KB · Views: 95
  • IMG_2165.webp
    IMG_2165.webp
    143 KB · Views: 91
  • IMG_2166.webp
    IMG_2166.webp
    128.4 KB · Views: 99
  • IMG_2167.webp
    IMG_2167.webp
    88.8 KB · Views: 92
  • IMG_2168.webp
    IMG_2168.webp
    132.6 KB · Views: 95
  • IMG_2169.webp
    IMG_2169.webp
    126.5 KB · Views: 93
  • IMG_2170.webp
    IMG_2170.webp
    101.1 KB · Views: 163
Also, have a 3D Printer in Arizona.

Happy to print anything for the members, just pay for materials and shipping.
 
Got creative again today and did my take on @EOD Guy trailer brake emulator so when I put my hitch rack on I don’t get the annoying stuff.
Pretty slick looking. You might be able to sell a few to those wanting a simple solution.

I assume you printed the Hex nut and purchased the other parts from Amazon.
 
I made some splash guards for the front that I printed with ASA. Took about 1.5 hours to print each side on a Bambu Labs X1C, 0.6mm nozzle. They are based off of the ARK Micro Flares; I'm using theirs for the rear wheels but I wanted a little more coverage on the bottoms for the front wheels.
Amazing idea. I just got new one wheel tire combo, and at 35mm I’m noticing quite a bit of overspray on doors. I keep seeing ark but getting mixed reviews on off they actually protect better.. what is your experience?
 
Pretty slick looking. You might be able to sell a few to those wanting a simple solution.

I assume you printed the Hex nut and purchased the other parts from Amazon.
Yep I ordered everything off Amazon and I already had the M3 stainless steel button head screw.
 
Yep I ordered everything off Amazon and I already had the M3 stainless steel button head screw.
It really is a top shelf solution. If you do get some requests and consider make a few...... you might think about modeling just a "stand off cup" vs the nut, for those that might want to run stop/running lights on their bike racks, that way thy could use the cable gland that comes with the replacement 7 pin plug/connector.
 
It really is a top shelf solution. If you do get some requests and consider make a few...... you might think about modeling just a "stand off cup" vs the nut, for those that might want to run stop/running lights on their bike racks, that way thy could use the cable gland that comes with the replacement 7 pin plug/connector.
I will see about designing that. May attach to the center reverse light stud.
 
I will see about designing that. May attach to the center reverse light stud.
I designed my alum one to be free floating with a slot in one side for the wires to pass through. When the orig gland nut is tightened down it captures the cup but allows the wires to exit the connector.
 
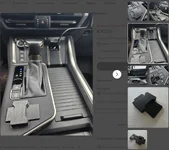
Maybe someone could print off one of these for the LC 250?

Screenshot 2026-03-24 at 4.13.11 PM.webp GX550 Switch shield.


My dog has managed to switch the low gear, center diff and rear diff locker while I was talking to a neighbor with the 250 running.

IMG_6478.webp Remi the ruiner
 
Does anyone have any suggestions or tips on which 3d printers I should consider? I have been wanting to pick one up for a while.
 
Supporting Vendors View all →
Back
Top Bottom