๐Ÿ› ๏ธ Member Build ERROR504

Member Build

ERROR504

Well-known member
Joined
Feb 10, 2025
Messages
637
Media
151
Reaction score
614
Location
Virginia
Vehicles
2025 LC 1958
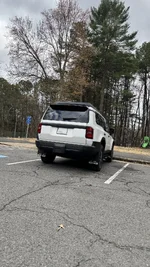
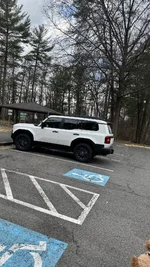
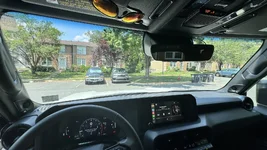
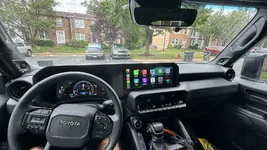
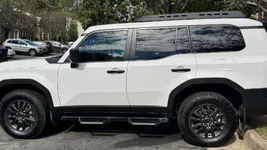
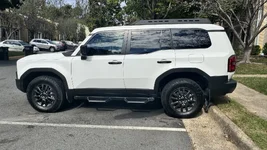
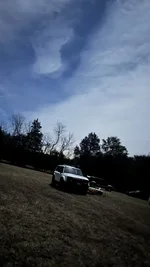
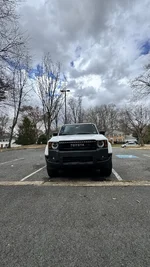
Got my LC last month and already made several changes. Weather was incredible today and decided to snap a few pictures at the dog park. Will post better pictures when I get a chance.

Current build (everything completed after purchase):
  1. Ceramic coat
  2. PPF entire vehicle except for the roof
  3. Fist edition roof rack
  4. Predator steps
  5. Horn
  6. Fist edition style mud flaps
  7. Footwell lights
  8. Dongar dash cam attachment
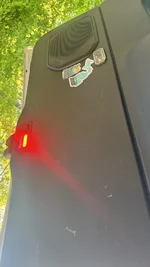
  9. Lift gate lighting
  10. Molle panel
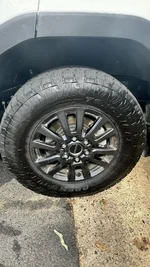
  11. Toyo open country at3 265/70/18
  12. Votex magnetic drain plug

Future build items:
  • behind grille light bar
  • raised platform in the rear to car camp
  • New rims (low priority)
  • victory 4x4 roof rack led light (tbd after a few camping/trail runs)
 

Attachments
  • IMG_2024.webp
    IMG_2024.webp
    421.3 KB · Views: 732
  • IMG_2022.webp
    IMG_2022.webp
    536.9 KB · Views: 575
  • IMG_2020.webp
    IMG_2020.webp
    560.3 KB · Views: 561
  • IMG_2016.webp
    IMG_2016.webp
    102.3 KB · Views: 604
  • IMG_1851.webp
    IMG_1851.webp
    286.8 KB · Views: 584
  • IMG_2032.webp
    IMG_2032.webp
    296.6 KB · Views: 559
Last edited:
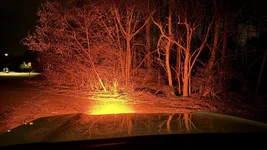
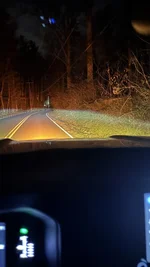
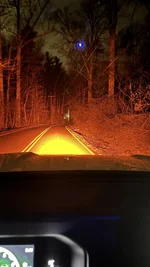
Amber grille light bar has come in handy a few times already during these summer shit storms. Visibility is still shit with the rain storms but at least I know the person infront of me can see me.
IMG_2310.webp
 

Attachments

  • IMG_2311.webp
    IMG_2311.webp
    367 KB · Views: 393
  • IMG_2306.webp
    IMG_2306.webp
    130.1 KB · Views: 363
  • IMG_2307.webp
    IMG_2307.webp
    186.8 KB · Views: 395
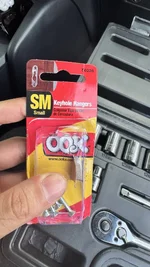
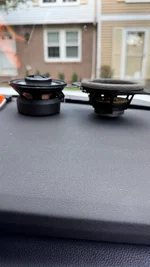
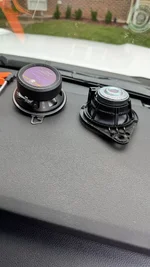
Thanks to the folks in this thread. Upgrading the dash speakers is a breeze. It doesnโ€™t take more than 10 minutes on each speaker. I would say the only difficult part would be prying off the cover gently so you donโ€™t scratch the dash. I donโ€™t feel like fabricating a mount for the speaker, so I went to Home Depot and bought one of these keyhole hangers. Then just use a screw with a bolt to tighten it down to extend it to the mounting point on the dash. It still sucked doing it in the heat, but at least it was quick.
 

Attachments

  • IMG_3388.webp
    IMG_3388.webp
    178.8 KB · Views: 406
  • IMG_3385.webp
    IMG_3385.webp
    157.4 KB · Views: 383
  • IMG_3386.webp
    IMG_3386.webp
    262.3 KB · Views: 374
Last edited:
Wanted to wait to post this on my builds page till I had a decent solution for the mic.
This is the before and after shots of installing an aftermarket head unit with a Beatsonic preamp. Honestly, super impressed with the sound quality. Definitely brings the JL dash speakers alive too.

Aftermarket head unit pros:
  • takes up the full space..no more black space bezels.
  • very responsive head unit
  • can disable WiFi/internet to keep it a dummy unit.
  • car play is very quick and responsive
  • resolved the annoying OEM issue when car play would read a text and it wouldnโ€™t mute the music in the background.
  • all steering controls work.

Cons:
  • loss of OEM microphoneโ€ฆThe ones that come with it are garbage.
  • the backup camera is really granny..hopefully a higher quality plug in play option will be made available.

I bought several mics off Amazon, and this Sony is the best one so far. For now, I have it taped just behind the head unit where you canโ€™t see it sitting inside, but above the center โ€œspeakerโ€ panel where it can pick up my voice. Still playing around with different harnesses to regain functionality. Hopefully, Iโ€™ll figure it out,but letโ€™s not keep our hopes up ๐Ÿ˜‚.
IMG_3520.jpeg
 

Attachments

  • IMG_3438.webp
    IMG_3438.webp
    326.7 KB · Views: 336
  • IMG_3519.webp
    IMG_3519.webp
    339.5 KB · Views: 331
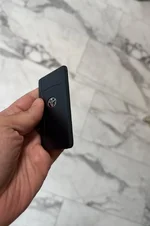
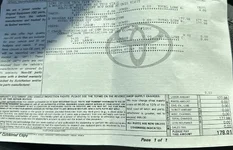
Got the keycard working on my 1958.
Total cost $373:
  • keycard: $170 (found a dealer that had it on sale)
  • blade with cut: $25 (on eBay)
  • programmed by dealer: $178 (1hr rate of tech)

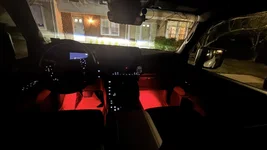
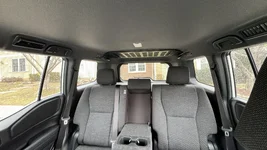
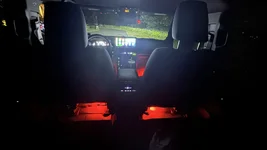
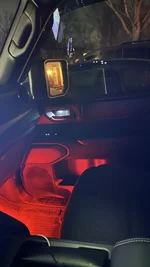
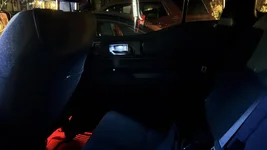
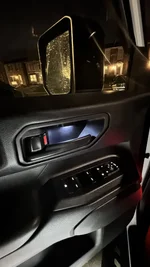
I had installed footwell lighting before in the front. To be honest I was content with thisโ€ฆuntil I dropped my wallet and it slid underneath the chair. The shadow the map light cast made it super difficult to find it. Out of anger I installed rear footwell. I have a break down on how I did it here. Overall it was super easy and happy with the way it turned out.
 

Attachments

  • IMG_4001.webp
    IMG_4001.webp
    46.4 KB · Views: 291
  • IMG_3998.webp
    IMG_3998.webp
    382.4 KB · Views: 276
  • IMG_4022.webp
    IMG_4022.webp
    67.4 KB · Views: 293
Got my LC last month and already made several changes. Weather was incredible today and decided to snap a few pictures at the dog park. Will post better pictures when I get a chance.

Current build (everything completed after purchase):
  1. Ceramic coat
  2. PPF entire vehicle except for the roof
  3. Fist edition roof rack
  4. Predator steps
  5. Horn
  6. Fist edition style mud flaps
  7. Footwell lights
  8. Dongar dash cam attachment
  9. Lift gate lighting
  10. Molle panel
  11. Toyo open country at3 265/70/18
  12. Votex magnetic drain plug

Future build items:
  • behind grille light bar
  • raised platform in the rear to car camp
  • New rims (low priority)
  • victory 4x4 roof rack led light (tbd after a few camping/trail runs)
looks great - what did you use for the lift gate lighting? thanks
 
Bronze heritage caps are on. I did slightly scratch one rim when I tried to put it on myself. I waited for tire rotation to get them on.
 

Attachments

  • IMG_4250.webp
    IMG_4250.webp
    276.3 KB · Views: 268
  • IMG_4251.webp
    IMG_4251.webp
    382.4 KB · Views: 254
  • IMG_4252.webp
    IMG_4252.webp
    368.1 KB · Views: 252
Reverted back to OEM A pillar. I found the aftermarket JBL one was having some audio โ€œharshnessโ€ on some songs after my JL audio dash speaker upgrade. Sounds better now imo.
IMG_4424.jpeg
 
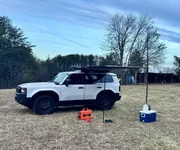
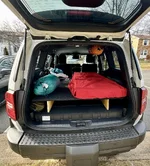
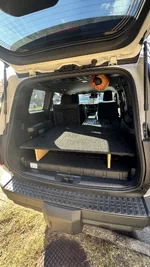
Went camping this weekend. Hereโ€™s a few shots of my setup with my diesel heater and my DIY bam bed.
 

Attachments

  • IMG_5218.webp
    IMG_5218.webp
    591.6 KB · Views: 333
  • IMG_5222.webp
    IMG_5222.webp
    98.6 KB · Views: 341
  • IMG_5214.webp
    IMG_5214.webp
    471.2 KB · Views: 348
  • IMG_5249.webp
    IMG_5249.webp
    312.5 KB · Views: 226
Last edited:
Looks great! What light bar did you use behind the grill and how did you mount it?
 
Looks great! What light bar did you use behind the grill and how did you mount it?
I got the slim version from M&R. I followed the install video they had on YouTube and came with brackets to mount so itโ€™s flush/oem looking. Itโ€™s not difficult to install at all, but it just takes time.
 
I like how it turned out. Not super bright to annoy me when I drove around at night. For the price I say itโ€™s a nice addition. Link if anyone is interested.
 

Attachments

  • IMG_6160.webp
    IMG_6160.webp
    80.1 KB · Views: 8,343
  • IMG_6163.webp
    IMG_6163.webp
    75.5 KB · Views: 135
  • IMG_5821.webp
    IMG_5821.webp
    126.9 KB · Views: 163
Last edited:
Hi just saw that youโ€™ve installed an android head unit in your 1958. Ooc did you retain function of your usb c ports in the area in front of the shifter?
 
Hi just saw that youโ€™ve installed an android head unit in your 1958. Ooc did you retain function of your usb c ports in the area in front of the shifter?
Yes i was able to retain function to the usbc port, still able to connect to the unit directly by usbc if i want too.
 
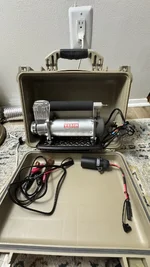
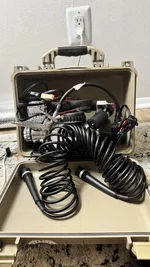
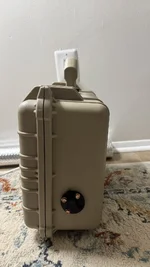
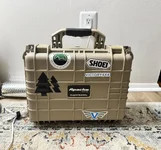
Grabbed a used Apache 3800 for cheap on the marketplace. Using this to store and slowly mount my Viair compressor.
End goal here is to have the base plate secured to the bottom of the case where I can have the case mounted to an external window MOLLE panel. Donโ€™t have the panel yet but itโ€™s on my wish list of things. Once victory has another sale Iโ€™ll prolly snag one.

I drilled a hole into the case and mounted a SAE plug and spliced the Viair cable. I want to have the option of battery clips and the new 7-pin connector I got.

Everything fits nicely inside the case. Like it better than the clunky soft case it came with.
 

Attachments

  • IMG_6436.webp
    IMG_6436.webp
    194.4 KB · Views: 129
  • IMG_6435.webp
    IMG_6435.webp
    226.9 KB · Views: 115
  • IMG_6434.webp
    IMG_6434.webp
    114.2 KB · Views: 122
  • IMG_6433.webp
    IMG_6433.webp
    335.4 KB · Views: 107
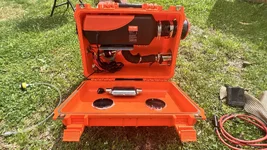
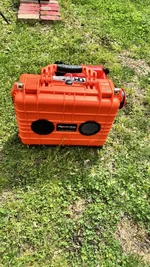
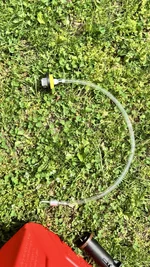
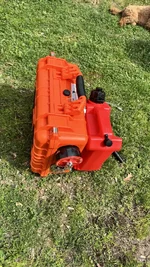
Last Apache case build...for now lol. Here is my updated diesel heater build. Originally I tried to have a smaller fuel tank i bought off online to drill it to the back of the case. Unfortunately the night before when i tested my setup the tank was leaking a ton at the seam. Quickly drove to walmart bought a fuel can and used fuel sealer around the fuel line i created. It worked...but I had some diesel leak on my sleeping bag which i found out when setting up at my camp site (back in January).

IMG_5209.png


Back to the drawing board i bought a vevor roto pack and a quick release fuel adapter from unethicalmfg. Its pretty slick stuff Imo and really like the latch and that it came with spare parts!

IMG_6444.jpeg


I wont go into details on how to complete this build as its covered ton on YouTube. Its worth it as when I had gone in January it was roughly 15-18f over night and this heater on the lowest setting had my cabin heated to 60-65f.
 

Attachments

  • IMG_6448.webp
    IMG_6448.webp
    506 KB · Views: 119
  • IMG_6441.webp
    IMG_6441.webp
    606.4 KB · Views: 110
  • IMG_6443.webp
    IMG_6443.webp
    664.1 KB · Views: 109
  • IMG_6440.webp
    IMG_6440.webp
    602.4 KB · Views: 127
Last edited:
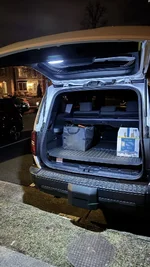
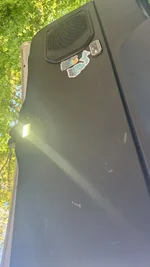
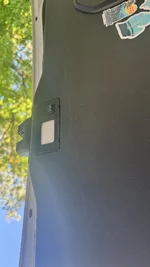
Switched the cargo light to the Obsidian3D one. Iโ€™m impressed with the build quality. Canโ€™t wait to test it out at night.
 

Attachments

  • IMG_6482.webp
    IMG_6482.webp
    117 KB · Views: 115
  • IMG_6483.webp
    IMG_6483.webp
    158.4 KB · Views: 103
  • IMG_6481.webp
    IMG_6481.webp
    145.5 KB · Views: 130
Switched the cargo light to the Obsidian3D one. Iโ€™m impressed with the build quality. Canโ€™t wait to test it out at night.
I was about to buy the Amazon one you installed. What prompted the change? Any dislikes of the Amazon light?
 
I was about to buy the Amazon one you installed. What prompted the change? Any dislikes of the Amazon light?
I like that this one had a dedicated off button as well as dual light white/red. A few times I went out to the mountains/camping and I would pop the trunk lid open. The white light was a little too blinding. New one I can at least turn it off or have the red light on for those times.
 
Supporting Vendors View all โ†’
StickerFab
Back
Top Bottom