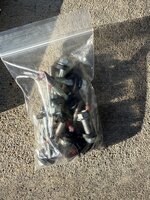
Hardware:
63230-42010 qty 8 (long bolts for end supports)
90119-08D28 qty 4 (short bolts for center supports)
63437-60050 qty 12 (seals for bolt holes)
Just to verify, this is for the luggage rack/rails. It is critical to replace the hardware above. If you buy a used set, they will likely come with the used hardware, and the seals are adhesive and will be on the supports (those will be removed and replaced with the new ones). The two gray/silver colored bolts without the rubber washers DO NOT require replacement (they are for the center support; one on each side). It is definitely crucial to replace the hardware as indicated by the installation guide, and use the correct torque specs. I will prolly just take photos and upload to this thread. The instructions are not on the typical Toyota format, but I have “decoded” them (they are from Toyota).
Thanks for the info and you’re correct, I’m installing the oem room rails ‘takeoffs’ from a forum member. This might be helpful to have it’s own separate thread since I see these sell in the marketplace all the time?
Hardware:
63230-42010 qty 8 (long bolts for end supports)
90119-08D28 qty 4 (short bolts for center supports)
63437-60050 qty 12 (seals for bolt holes)
Just to verify, this is for the luggage rack/rails. It is critical to replace the hardware above. If you buy a used set, they will likely come with the used hardware, and the seals are adhesive and will be on the supports (those will be removed and replaced with the new ones). The two gray/silver colored bolts without the rubber washers DO NOT require replacement (they are for the center support; one on each side). It is definitely crucial to replace the hardware as indicated by the installation guide, and use the correct torque specs. I will prolly just take photos and upload to this thread. The instructions are not on the typical Toyota format, but I have “decoded” them (they are from Toyota).
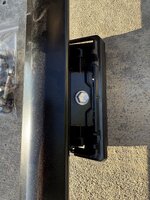
I installed a set of take-off roof rails a few months ago...
Reused the the bolts, I guess you could re-apply some loc-tite, blue 248 should be fine. I don't think I bothered. I used permatex RTV Silicone for the seals. If I remember correctly, it's 13 lb-ft torque for the bolts (Pls correct me if I am wrong).
Is this video close to what was needed for installation? It’s a generic/non-oem roof rail installation.
Their steps:
1. assemble the racks
2. took off the non-rail covers and bracket (roof drip side finish molding & bracket that’s underneath)
-take out one bolt a little then take out the other out a little more, be careful not to crack the white plastic holder)
3. cleaned bolt holes
4. put down circular padding around bolt holes
5. put middle bracket on bolt holes
6. Add gasket + sealant/locktite on middle bolts
7. Install middle bolts
8. add roof rail bracket to front and rear
9. Put on roof rails
10. put gasket, sealant/locktite on bolts
11. tighten bolts (no gasket/sealant on silver middle bolt)
12. Install covers
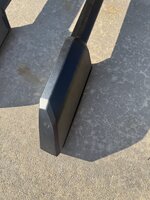
Seems pretty close. I can’t remember why but I do think you should install the center brackets first.
I also forgot to mention I used gorilla flange tape for the missing seals, adhering to the rail side installation (just stick it on footprint of the rail and cut out the silhouette). Then followed up with RTV silicone around the mating surface. Probably overkill. But do it once, do it right.